Showing posts with label International Naval Wargaming Day. Show all posts

Sunday, August 7, 2022

2022 International Naval Wargamine Day - Lissa 1866

After a bit of a hiatus from gaming and painting, a few of us got together on Saturday for an International Naval Wargaming Day game. For those of you that are unfamiliar with International Naval Wargaming Day (INWaD), in 2017 David Manley, well know rule writer and naval gamer, kicked off the first INWaD as a day to "Celebrate the birth of the father of naval wargaming, Fred T. Jane, by running or taking part in a game of your own!"


Our INWaD game this year covered the 1866 Battle of Lissa. We used 1/600 scale ships and the Sail and Steam Navies rules with the optional gun group rule (slightly modified). The ships are from Bay Area Yards, which can still be found on Facebook. It was a group project with 3 of us putting together the ships. We included all 1 Italian ironclads, 7 Austrian ironclads, and 7 Austrian wooden ships that formed the Austrian second line. 


The Austrians were set up in 2 wedge formations, with the ironclads leading the way, and could start at full speed. The Italian ships were set up in a line ahead formation, but a little strung out and limited in their initial speed. This was done to represent Italian command confusion in the historic battle.

Austrian setup, with the ironclads in front
Italians in line ahead (the last 3 ships are out of the photo)

To help get the game going, the Austrians were set up close enough for some ships to make ram attacks on by the end of turn 1.

Austrians closing with the Italian line

The Italians fired at the closing Austrians. Most shots were ineffective, but one lucky hit damaged the engines on the Austrian ironclad Salamander leaving it to limp along. But even with the close setup, the Austrians were only able to ram 2 Italians on the first turn.

Two Italians (top and center) are rammed. The lower ship didn't quite make it

The ram results proved to be devastating, leaving both Italian ships (Ancona and Re D'Italia) in a sinking condition. The Austrian rammers were able to back out and look for other Italians.

Hapsburg (top) and Erzherzog Ferdinand Max leave Ancona and Re D'Italia sinking

The Italians exacted some revenge on the next turn as San Martino rammed and sank Don Juan De Austria.

Don Juan sinking

At the rear of the Italian formation, Prinz Eugen rammed Re Di Portogallo but didn't do enough damage to sink the giant ironclad. However, the ships did become fouled and would spend the next couple of turns trying to separate themselves.
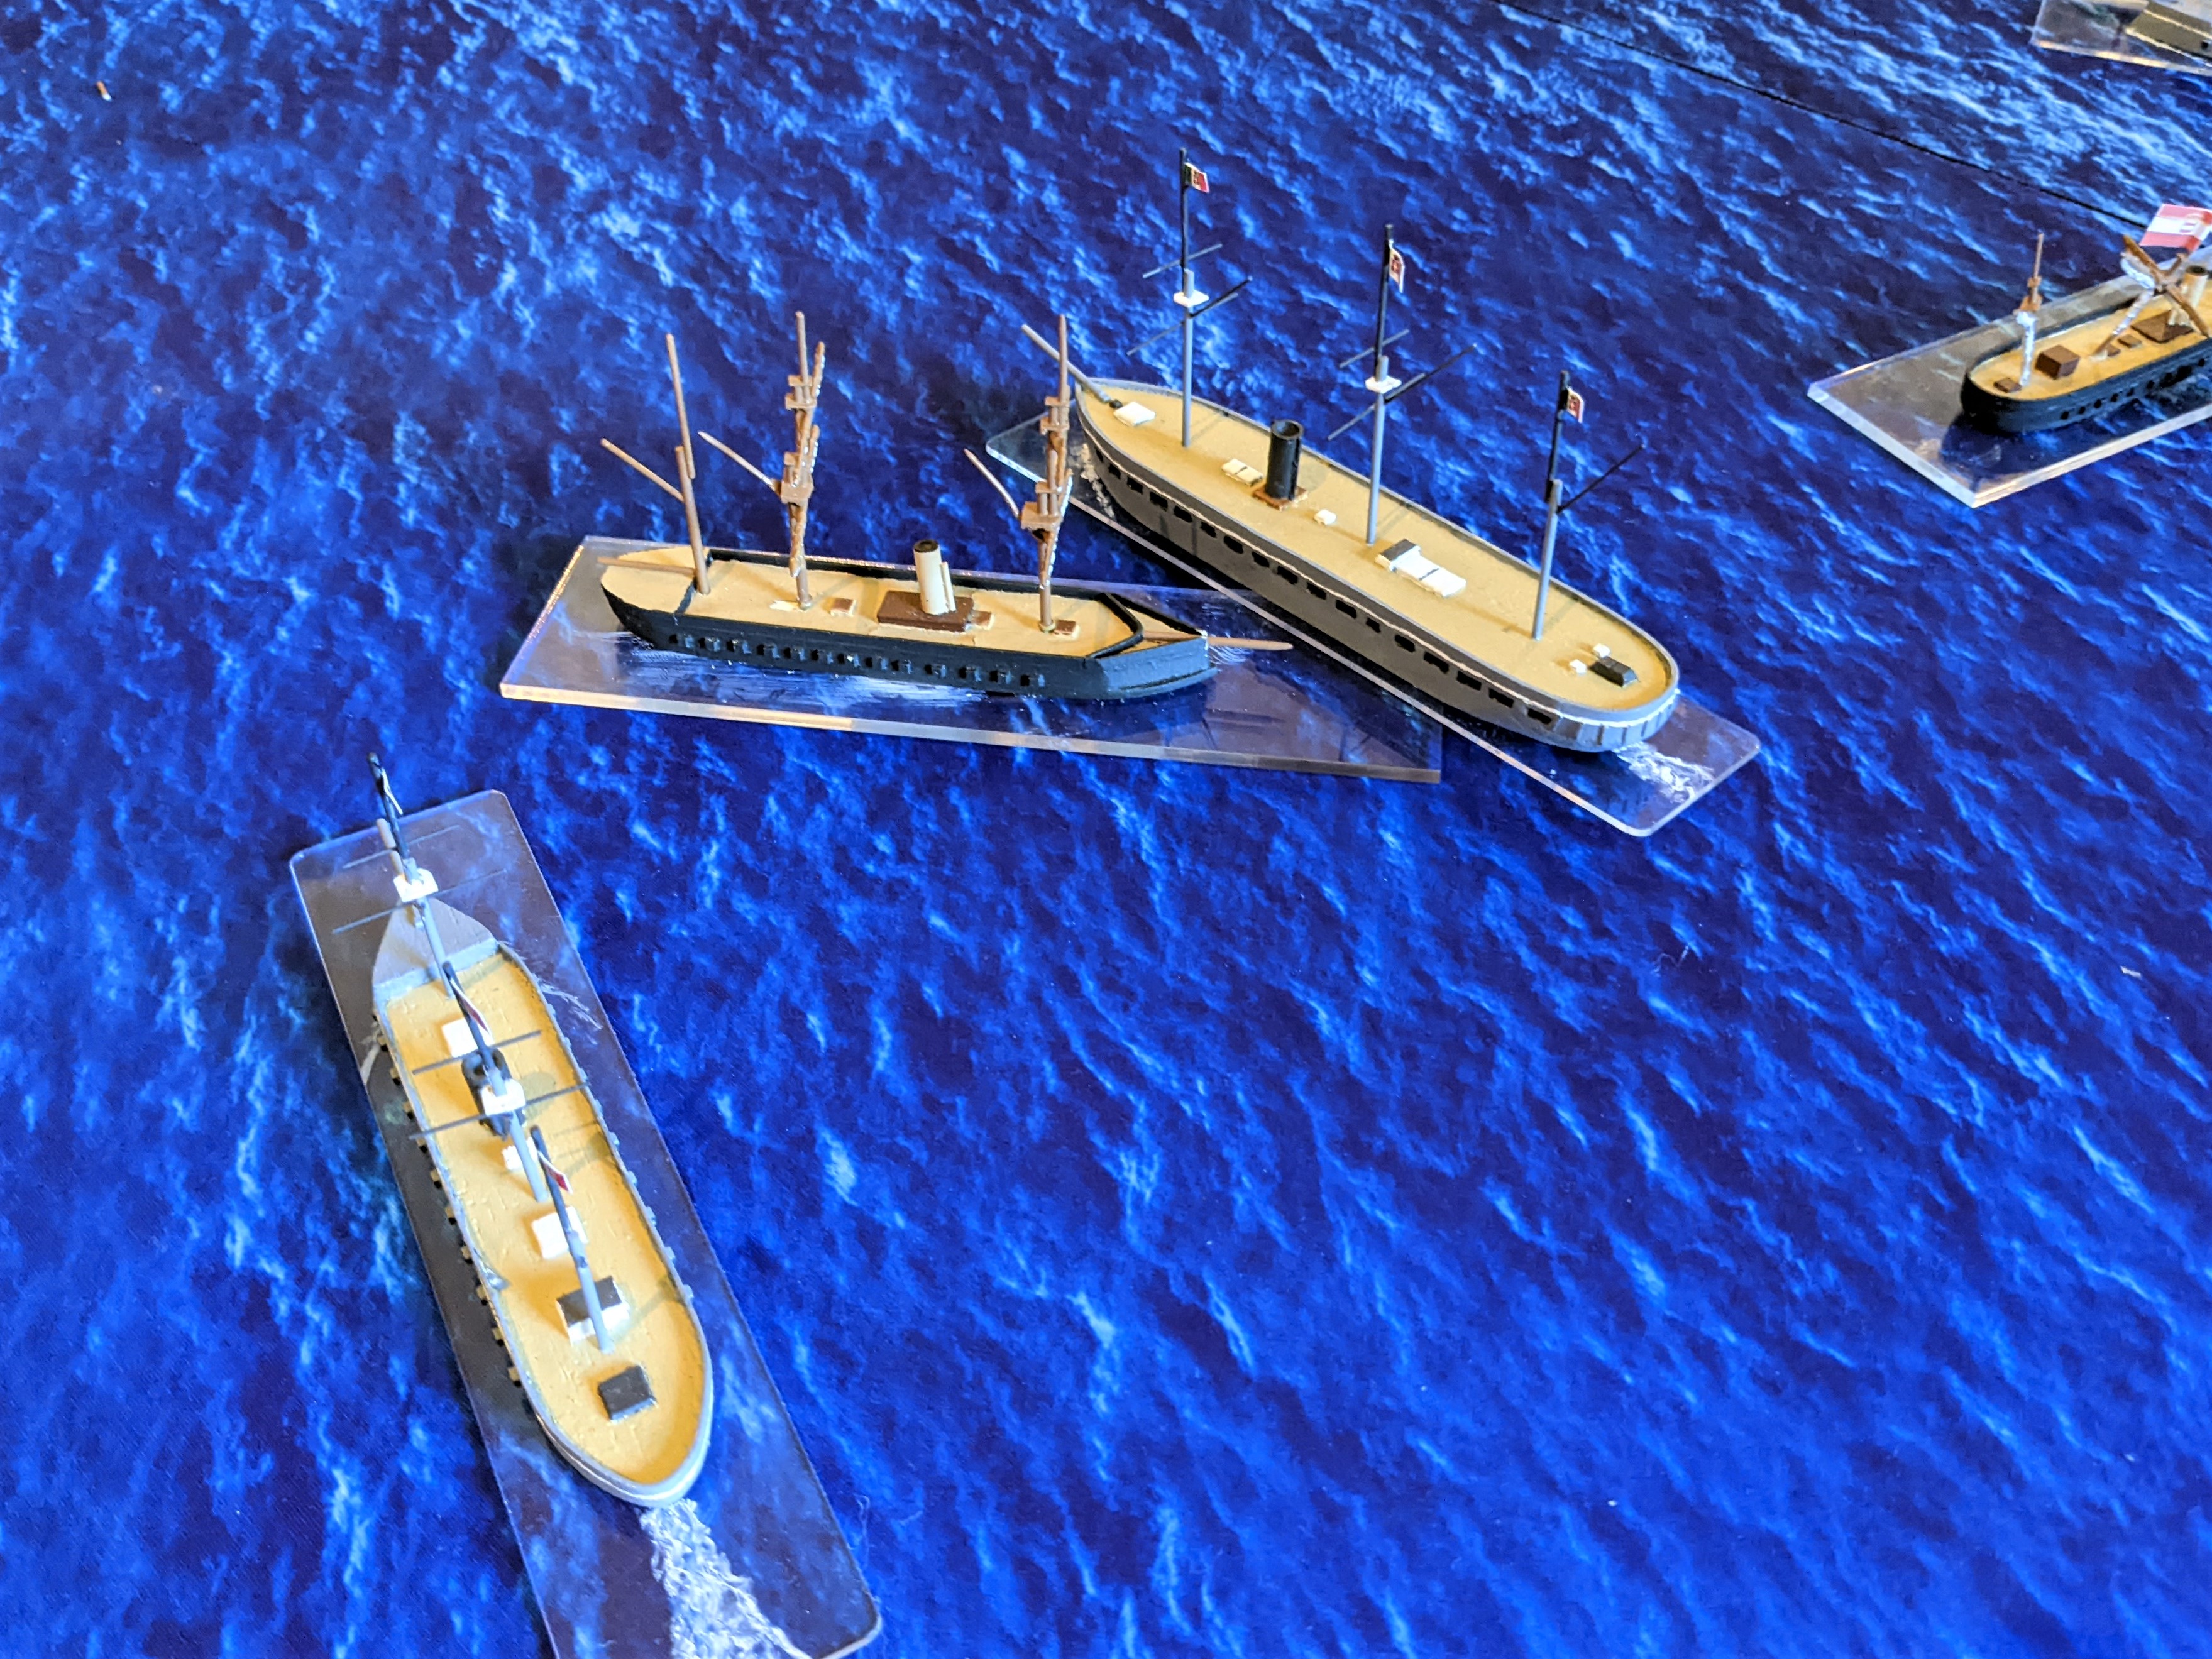
Prinz Eugen and Re Di Portogallo locked together

By this time the Austrian second line was getting into action. The Austrian wooden 92-gun steam ship of the line Kaiser tried to ram the Palestro, but it was only a glancing blow with no damage done. But this did allow Kaiser to turn parallel to Palestro and unleash a full broadside on the next turn. The short range broadside racked the armor on Palestro and encouraged the Austrians to try to get Kaiser within short range of other Austrian ships.

Kaiser attempts to ram
Kaiser and Palestro exchange fire

The lead Italian ships, Principe De Carignano and Castelfidardo, found themselves in a target rich environment, which made maneuvering, ramming, and avoiding being rammed difficult. 

Lead Italian ships moving through the Austrians

During the game, there were some effective gun shots, but most of the time it was just chipping away at armor. Several players remarked that the game felt more like galley warfare than ironclads. 

The scrum on the right side was starting to break up with several ships seeking open water, so we decided to call the game at this point. The Italians had lost 2 ironclads, but most of the remaining ships were battered enough that they may no survive further action. The Austrians lost 2 ironclads and 2 wooden ships, but most of their other ships were in decent shape. We decided this was an Austrian Pyrrhic victory - a win but not a great win.  

One last photo of the scrum on the right side of the table

Overall it was a fun game and kept everyone involved. The results were mostly historical, with ram attacks proving effective and gunnery not so much.

Sunday, August 8, 2021

International Naval Wargaming Day - ImagiNations Dreadnought Battle

Work schedules and my own poor planning meant I would do a solo game for International Naval Wargaming Day (INWAD). For those of you that haven't heard of INWAD, in 2017 David Manley, well known naval gaming guru, kicked off the first International Naval Wargaming Day as a day to "Celebrate the birth of the father of naval wargaming, Fred T. Jane, by running or taking part in a game of your own!" I always play a naval game on August 6, but most of the time it is a solo project.

This year I'm doing an engagement from my solo ImagiNations Dreadnought campaign. So far each side has created their initial fleets, based on the doctrine of their admiralty boards, and with war now declared both sides prepared for engagement. Three missions were set for the first month of war; two Sea Sweeps (basically naval meeting engagements) and a Nordland convoy mission.


Nordland assigned two class battlecruisers, plus two scout cruisers and two destroyer flotillas to each sweep mission. The Nordland Admirals expected the Rask class battlecruisers to use their speed to hunt down smaller ships while avoiding larger ones, and these assignments would put that theory to the test. The convoy mission was carrying troops and supplies to a disputed island and would  have a heavy escort of three Hurtig class battlecrusiers, two Kaftig class battlecruisers, two cruiser divisions, and two destroyer flotillas. See my previous campaign post for details on the battlecruisers.


Tierra del Sur's Admirals felt that splitting up their slower battleships to cover all the missions would invite disaster. So they concentrated their six battleships into one force and sent it after the convoy. Thinking (hoping) that Nordland would do the same, they sent a token cruiser-destroyer force on one sea sweep while the other would be unopposed. 


The weather in the region generally means visibility at sea is good, meaning that most actions will start a longer ranges. This proved to be the case in both the opposed missions. The sea sweep was an unequal match, with the Tierra del Sur destroyers desperately making smoke to try to allow the cruisers to escape. But the Nordland fast battlecruisers were able to use their speed and long range guns to sink the entire Tierra del Sur force.


The convoy mission was a much more interesting battle, pitting five Nordland battlecruisers against six Tierra del Sur battleships.  Nordland had the edge in speed and the Kaftig class had the advantage in gun range, but the Tierra del Sur ships had better protection and heavier guns. To make this post a little more entertaining, I played out the game on my ocean mat with a hex grid overlay using some Figurehead 1/6000 miniatures as proxies for the ImagiNations ships.

Tierra del Sur battleline

Good visibility allowed the forces to spot each other at long-range and giving the Kaftig class the opportunity to engage the enemy without them being able to fire back. 

Nordland battleline before the destroyers and cruiser shift to the unengaged side

The Tierra del Sur admiral initially decided to try to close the Nordland ships. But the faster Nordland ships were able to maintain the range, limiting engagement opportunities for enemy battleships. As the engagement continued damage slowed the first and second battleships in the del Sur line, both Fuerte class battleships, forcing the del Sur admiral to make a decision about slowing the battleline or leaving the battleships behind.

Damage to the leading Fuerte class battleships

The del Sur admiral decided to keep his force together and, seeing the futility of trying to pursue the faster enemy, turned his force north toward the estimated position of the enemy convoy. This course change found the Nordland ships out of position. As the Nordland ships raced to get back in front of the del Sur battleships, the range closed to allow all the ships to engage.


Both sides took damage in the exchange, which slowed a Nordland battlecruiser and sank one of the damaged Fuerte battleships. The del Sur admiral was again faced with a dilemma - his lightly damaged battleships could now maintain range with the Nordland force, but if he left the heavier damaged battleships behind he would be outnumbered five to three. 

Good shooting bashes the del Sur battleships

Nordland battlecruisers taking damage

Having already lost one battleship, the del Sur admiral decided to break off the action. Destroyers were ordered to make smoke and battleline turned south. The Nordland admiral, knowing that his primary mission was to get the troop convoy through, chose not to pursue the enemy. 


At the end of the first month of the war Nordland lost a cruiser division and one Hurtig battlecruiser was damaged. Tierra del Sur lost a Fuerte class battleship, two cruiser divisions, and two destroyer flotillas and had one Fuerte battleship damaged. Victory point wise, Nordland had a commanding lead having won each of the first month missions.

Friday, August 7, 2020

INWarD 2020 - Der Tag:1916

While I already posted an early International Naval Wargaming Day (INWarD) report, I thought I would also play a quick solitaire game on the official day. 


I selected the new Der Tag, 1916 game from Minden Games.You can get this directly from the Minden Games website, or as part of Panzerschreck #17 from Minden Games or at Wargame Vault. Panzerschreck #17 also includes two other games; Battle Over Dunkirk and Napoleon in Italy.

Der Tag cover

Der Tag, 1916 is a solitaire strategic game covering naval action in the North Sea during 1916. It puts the player in charge of the British fleet. There is an optional rule that allows you to switch sides and command the Germans, but for this game I stuck with the British. 


The game has 4 turns, with each turn composed 10 steps. That seems like a lot, but each step moves pretty quickly and some steps can be skipped depending on the situation.


At the beginning of the turn, you redeploy your ships to the four Royal Navy bases (Scapa Flow, Cromarty, Rosyth, and Dover). The only restrictions on the deployments are that each base has a maximum and minimum number of ships. In keeping with your high-level position, ships are deployed by type; BB+ (second-generation Dreadnoughts), BB (Dreadnoughts), BC (Battlecruisers), B (pre-Dreadnought battleships), and AC (Armored Cruisers). The game does come with named counters for the ships, but only types matter for deployment and combat. 


Next an action card is drawn. The action cards set what the German fleet does for the turn and where it happens. Most cards are raids or other missions where a portion of the German fleet comes out for a limited action. A couple cards are No Action, which means you skip all the remaining steps and go to the turn. One card is Der Tag, which represents a sortie by the full German fleet for a Jutland style battle.


After drawing the action, you use die rolls to determine the weather, the German ships in action, and location of the action. Then the Royal Navy player makes interception rolls to get ships to the action. 


Once you know which ships intercept, you set up combat. Combat can last up to 3 rounds. The German ships can participate in all 3 rounds, but Royal Navy ships may be limited to 1 or 2 rounds depending on their home base. Additionally, combat rounds may be cut short due to weather or other circumstances.


Combat is easy. You roll one die for each ship and consult the appropriate ship type table. The rolls result in automatic hits, hits, and saves. Each save negates an enemy hit, but not automatic hits. For each remaining hit, you roll to determine the ship type affected and then roll to see if the ship is sunk or just damaged. Damaged ships don't participate in the remaining combat rounds. 


When combat is complete, you score victory points based on the German action and any ships sunk during the turn.

North Sea Strategic Map

I started my game with the standard Royal Navy setup, with the fleet concentrated at Scapa Flow and Cromarty. Rosyth had most of the BCs and a handful of BB+ ships. Dover force had one BB, 7 old Bs, and 3 ACs. The German action was a BC raid on Hull. I tried for interceptions from all bases, but only the Rosyth and Dover forces were successful. The combat rounds resulted in some damaged ships on each side, but no ships were sunk and the Germans earned a victory point for the raid. 


On turn 2 I redeployed all my BCs and a couple more BB+s to Rosyth, but kept the main fleet in the north. The German action was a Tip & Run battle on Scarborough with all their BCs, 3 BB+, and 3 BB. This time the interception rolls went in my favor with Scapa Flow and Rosyth getting success rolls. However, the Scapa Flow force would not arrive until combat round 3. The first 2 combat rounds saw damaged ships on both sides and a German BC sunk. The third combat round was more decisive, with 17 battleships (8 BB+ and 9 BB) engaging the much smaller German force. When the smoke cleared, another German BC and 2 battleships had been sunk with no losses for the Royal Navy. The Germans did earn a victory point for the action, but this was more than offset by the victory points earned for the sunk ships. 


I didn't make any deployment changes for turn 3. The German action was another Tip and Run battle off Norway. This time the Germans sent all their remaining BCs, BB+s, and BBs. Luck was on my side again as I rolled successful interceptions for Scapa Flow, Cromarty, and Rosyth. This gave me a definite superiority in ships with 7 BC, 22 BB+, 9 BB, and 8 AC against 3 BC, 9 BB+, and 6 BB. But this is where my dice failed me. While I got lots of hits during combat, I couldn't translate those into sunk ships. The German dice were a little better, as they sank a BB+ and an AC, but they didn't earn any extra victory points for the action.


Going into turn 4, I still had a 18 to 8 lead in victory points. But bad rolling could change that. I shifted a couple more BB+s from Scapa Flow to Rosyth,but kept the other forces as is. The German action turned out to be No Action, which ended the turn and the game with a win for the Royal Navy. A fitting end for INWarD 2020.


The game played quick and was fun. There is a lot of variables in the actions, so I can see myself pulling it out again. The game also doesn't need much table space, so it would make a good travel game. 


I generally like the little games that Minden Games produces and would recommend taking a look at their website, but I know they aren't for everyone.

Monday, August 3, 2020

Early International Naval Wargaming Day Battle

I hosted another outdoor gaming session over the weekend and decided to run an early International Naval Wargaming Day game. The reasons for the early game is that August 6 is on a weekday and most of my gaming group are busy on the weekend. So this looked to be my best chance to get in a naval game with other people. I have something in mind for a solo game on August 6, but more on that later.

For those of you that are unfamiliar with International Naval Wargaming Day, in 2017 David Manley, well know rule writer and naval gamer, kicked off the first International Naval Wargaming Day as a day to "Celebrate the birth of the father of naval wargaming, Fred T. Jane, by running or taking part in a game of your own!"

For this year's game, I wanted to get the 1/1250 pre-dreadnought ships back in action. We are using the Fire When Ready rules, with some local variations that beef up the damage ships can take and limit the damage of smaller guns against armored targets.

A quick "vanity" shot of my French battleships with some coal smoke
I had proposed a couple order of battles for the game, which would pit a combined Austrian-German squadron against a French squadron. The general idea being that the Germans were visiting Austrian ports in the Adriatic and the French decided to send a squadron to demonstrate their disapproval. As the squadrons meet, someone says something that is misunderstood and the shooting starts (it wouldn't be much of a fight without shooting). I was able to talk the others into trying a 5 ship on 2 ship battle.

The Austrian-German squadron was made up of the light battleships Erzherzog Karl and Hapsburg, and the armored cruiser Sankt Georg.
Austrians ships (left to right) Sankt Georg, Hapsburg, and Ersherzog Karl
The Germans contributed the armored cruiser Furst Bismarck and (barely) protected cruiser Vineta.
German ship (left to right) Vineta and Furst Bismarck
The French force consisted of the battleships Charlemagne and Jena. 
French battleships
This scenario was designed to have a slower, but heavier force (the French) facing off against a lighter, but more numerous enemy (similar to Graf Spee at River Plate or the hypothetical WWI Goeben vs. British armored cruisers).
The Austrian-Germans turning in line
The Austrians heavy ships led the way, with the expectation that they would be able to better withstand the French guns. But this deployment did cause the Germans to be blocked and unable to fire for the first few turns.
The view from the French side
As expected, the French concentrated their fire on the two lead Austrians. Throughout the game French die rolls were really good. Early in the battle Erzherzog Karl took a lot of hits that slowed the battleship and jammed the rudder.
Erzherzog Karl being battered
The jammed rudder forced some fancy maneuvers on the Austrians to avoid a collision with the damaged battleship. At this point, the Germans decided this was a good time to strike out on their own, splitting up the squadron.
the combined squadron splits
The Austrians had been getting hits on both Charlemagne and Jena, but not doing a lot of damage. But the first German shot from Furst Bismarck did cause some excitement as it hit and started a raging fire on Charlemagne. The Austrians started another fire on the French battleship. While this was good news, there was also some bad news for the Austrians as Erzherzog Karl failed a morale check and began turning for home.
Raging fires on Charlemagne
With the Austrians and Germans split, the French shifted fire to the Germans. Their first shots only damaged the Furst Bismarck, but the second round of fire crippled the armored cruiser, While Vineta was almost sunk (once again the French die rolls were good as each of the German cruisers suffered a Bridge special hit that prevented return fire).

With both cruisers in bad shape, the Germans decided it was time to break off. The Austrians were in slightly better shape, but with the battle now 2 on 2 they also decided call it a day.
Austrians heading for home
Victory went to the French, but the battle was not as one-sided as it seemed. Charlemagne would eventually put out the fires, but not before one explosion, and was at her morale check point when the fires finally went out. Jena only took moderate damage and was still in good fighting shape. The good (and timely) French die rolls certainly made it look like the French had an easy time. But it could have turned out differently with average die rolls on both sides, it would have been a closer battle.

The test rule that limited the damage of smaller guns against armored targets definitely helped the French, but it also limited the damage done by the French secondary guns. Overall it seemed to work well and we will probably keep it.

Before we broke up for the day, I grabbed a quick photo of David's German and Japanese ships. I believe these are all manufactured by Hai, but David repainted and mounted all of them and they just look great.
Germans and Japanese (with red funnels)
As I mentioned at the start of the post, I will probably put together a solo game for the real International Naval Wargaming Day. See you then.

Wednesday, August 7, 2019

2019 International Naval Wargaming Day

In 2017 David Manley, well know rule writer and naval gamer, kicked off the first International Naval Wargaming Day as a day to "Celebrate the birth of the father of naval wargaming, Fred T. Jane, by running or taking part in a game of your own!"

With August 6 being a weekday (and due to my own poor planning), I played a solo naval wargame again this year. My idea was to try out a relatively new set of World War 2 naval rules by the aforementioned David Manley called Find, Fix and Strike. I took a quick look through my ship miniatures and decided to use the Second Battle of Guadalcanal to try out the rules. Here is the setup and special rules I used for the scenario. 
My setup for the battle (click for a larger image)
Before I get to the game, here is a little more about the rules. Find, Fix and Strike is available on Wargame Vault. It is a fast playing set of naval rules designed for use with models from 1/2400 to 1/6000. Bookkeeping is minimal, with damage recorded through a series of levels rather than keeping track of damage points. The rules also include a set of operational level campaign rules that provide a framework for linked battles and club campaigns.

The turn sequence is:
• Initiative Phase
• Ship Movement
• Air Phase (launch and move aircraft, resolve air-to-air combat, resolve air-to-ship combat)
• Gunnery combat
• Surface ship torpedo attacks
• End Phase (Resolve damage control and Remove dispersing smoke screens)

The rules are pretty easy to get into and most naval gamers will have them down in a couple of turns. Gunnery and air attack combat is resolved by competitive D6 die rolls, which are modified by the attacking ship's attack factor and defending ship's defense factor, along with some other modifiers for damage, range, etc. If the defender's modified roll beats the attacker, there is no damage. If they are equal, the defender is straddled and has a temporary negative modifier for attacks. If the attacker beats the defender, the defending ship is damaged with multiples of the defender's roll doing more damage. The levels of damage are Light, Heavy, Crippled, and Sunk, and there is also a chance of special (i.e. critical) hits. Light and Heavy damage still allows a ship to move and fight, but with negative modifiers for combat and, for Heavy damage, movement. Ships with Crippled damage cannot move and shoot with large negative modifiers. Players roll to repair ships during the End Phase. Players can use various methods to track ship damage, from keeping notes on paper to using markers. For my game I used some Litko explosion markers to show each level of damage.

For torpedo combat, the attacking player first rolls for a hit. It a hit occurs; a competitive die roll is made to check for damage. There are special rules for the Japanese long-range torpedoes.

Now, on to the game, I used 1/6000 scale miniatures for the game and my camera had trouble focusing on the small ships. So apologies for the fuzzy photos. Looking at the special scenario rules, I chose to have the Japanese Screening Unit enter on turn 4 at area B and the Bombardment Unit to enter on turn 6 at area C. I was thinking that this would give the Japanese a chance to catch the Americans in-between both forces. 
U.S. battleline ready for action
On the first turn the Americans won the initiative, closed with the Japanese light cruiser and destroyer, and caused heavy damage to both ships in the gunnery phase. 
Japanese light cruiser Sendai takes the first hit of the game
On turn 2, the other two destroyers from the Screening Unit entered, but, seeing the fate of their comrades, decided to keep their distance and move toward the Screening Unit entry point. The American finished off the two damaged ships.

American radar gave them an initiative and combat advantages. On turn 3 they were able to use those advantages to damage the remaining sweep Unit destroyers, putting the out of the fight, and get into position for the Screening Unit. The Screening Unit finally got some hits on the leading American destroyers with guns and torpedoes. But they had no luck against the battleships. 
U.S. destroyers (foreground) take damage while the lead Japanese ships take hits
At the end of Turn 5 most of the Screening Unit ships were damaged or sinking. The Americans left their damaged destroyers behind and moved to intercept the Bombardment Unit.
Japanese heavy cruisers (left and center) and battleship Kongo (right) move in for action
As the two forces engaged, the Japanese attack dice got better, and they were able to hit the battleship South Dakota with torpedoes. But it only resulted in light damage. Meanwhile, the Japanese battleship Kongo took heavy damage from the American 16” guns.
View from the Japanese side as Kongo (foreground right) and Takao (foreground left) take damage, while South Dakota (background left) and Preston (background right) are also hit
The two forces continued to slug it out, but the damaged Kongo and 8” cruiser guns weren’t able to do any more damage to the American battleships.
The view from the American side as Kongo (left background) and Atago (center background) take damage
With all the Japanese capital ships heavily damaged and unable to do anything to the Americans, I decided to call the game in favor of the Americans. The Americans did a lot more damage than they did historically, while taking close to historical damage.

The game played quickly, finishing up in a little more than an hour. The American dice were hot throughout the game, while the Japanese started cold and moved to average. With the limited visibility range, the American radar really helped out with initiative, spotting, and combat. The Japanese used searchlights during combat to negate some negative modifiers, but they could not effectively use their long-range torpedoes.

Overall it was a fun little game and the rules lived up to the fast play promise. I'm a fan of David Manley's rules, so you can take my comments with a grain of salt. The downside for the rules is that they could use a little more editing to clear up some confusing parts and clarifications around fighting night battles. I also wonder if torpedoes are a little under-powered (it seems like it is really hard to get hits), but I'll need some more playing time to really determine that. The rules work well for moderately-sized and large battles, where record keeping can really slow things down, but might not be good for small battles with small ships (although I expect they would play quickly). The campaign rules look like they could be fun to try out. 

Wednesday, August 8, 2018

International Naval Wargaming Day 2018

Last year David Manley kicked off the first International Naval Wargaming Day. A day to "Celebrate the birth of the father of naval wargaming, Fred T. Jane, by running or taking part in a game of your own!"
This year, Jane's birthday was on a Monday, which made it really tough to organize a game with other players. But the celebration must go on, so I grabbed some ships for a little solo action.

This year I pulled out some of my Spanish - American War ships for a little pre-dreadnought action using David Manley's Broadside and Salvo rules, which are included in his Splendid Little War mini-campaign. The scenario was an encounter in the Caribbean between heavy ships of the US Atlantic Squadron and Admiral Cevera's cruiser squadron.
Spanish cruisers (L to R - Infanta Maria Theresa, Almirante Oquendo, Viczaya, and Cristobal Colon) steaming to their fate
Two US battleships (Iowa and Indiana) and the armored cruiser New York
The Spanish objective was to escape across the map, while the Americans were trying to stop them.The Spanish cruisers had a little speed edge, but were out-gunned by the Americans, which is a pretty classic naval situation.

The turn sequence for the Broadside and Salvo rules is:
  1. Roll for Initiative 
  2. Roll for Action Points (these are basically command points to order your squadrons to maneuver and repair ships)
  3. Move ships (Initiative winner picks order) and allocate Action Points
  4. Gunnery - Initiative player shoots first and firing alternates by squadron with damage effect taking effect immediately
  5. Torpedo Phase - conduct torpedo attacks
  6. Repairs and Special Damage Phase
Overall a clean and easy turn sequence. Initiative proved to be an important part of the game.

The Spanish won the initiative on the first few turns, forcing the Americans to move first and then ordering max speed to try to slip by. But then the dice turned on the Spanish. The Americans won the initiative on the turn that both sides came into gun range and damaged the lead Spanish cruisers before they could return fire. But the Spanish were able to damage the American cruiser.

Gunnery is resolved by be competitive D6 die rolls, which are modified by the attacking ship's attack factor and defending ship's defense factor, along with some other modifiers for damage, range, etc. If the defender's modified roll beats the attacker, there is no damage. If they are equal, the defender takes a temporary hit. If the attacker beats the defender, the defending ship is damaged with multiples of the defender's roll doing more damage. There is also a chance of critical hits. One level of damage still allows the ship to move and fight, but with negative modifiers. A ship is Silenced with two levels of damage and can move, but not shoot. A ship is Crippled with three levels of damage and cannot move or shoot. Four levels levels of damage means the ship is sinking. Action Points can be allocated to repair Silenced (3 APs) and Crippled (4 APs) ships one level. I used markers to show each level of damage.

Over the next couple of turns the Spanish die rolling was very bad, while the Americans continued to inflict more damage on the Spanish line.
Spanish ships in trouble
The Spanish were able to repair one ship, but things just kept going downhill. In the end all the Spanish ships were sunk and the only damaged American ship was the cruiser New York.
Just before the end
The game played really quick. So quick, that I decided to try another game, but with a different scenario.

During the Spanish American War the American battleship Oregon made a high-speed (for those days) trip from San Francisco to the Caribbean. One of the fears was that Cevera's squadron would intercept the lone battleship. So, I decided to try out the four Spanish cruisers against one battleship.
Oregon, crossing the line (equator?)
The Spanish cruisers had the speed edge, so the battleship tried to put itself in the best gunnery position. The Oregon's heavy battleship armor stopped most hits, while her big guns dealt damage to the cruisers. Oregon did take one level of damage, but was able to silence three of the Spanish cruisers. Just when it looked like Oregon had everything in hand, Cristobol Colon scored a hit silencing the battleship.
Standoff at sea
With almost all the ships silenced, both sides hoped to roll enough Action Points for repairs and the Spanish also hoped for another lucky hit by Colon. But luck was with the Americans. They repaired the battleship first and finished off the Spanish cruisers.

Overall the games were quick, keeping with the fast-play rules, and deadly. The 1-on-1 squadron battles probably weren't as interesting as a multiple squadron action. After playing, I thought I should have created multiple squadrons in the first scenario to see how that would have played out. Another alternative would have been to add some more ships (regular cruisers for the Americans and torpedo boats for the Spanish) to make more squadrons.

The same rules are used with the Russo-Japanese War campaign and I think they would work well there, since both sides have more ships.


Sunday, August 13, 2017

My (belated) 2017 International Naval Wargaming Day post

Last Sunday was the first International Naval Wargaming Day. Unfortunately, I wasn't really able to organize a game with others to commemorate the day, so my part was limited to a solo-game in my on-going Tokyo Express campaign. Here is my belated game report.

After the successful August battle (described near the end of this post), I conducted a Battle Check for September, no battles, and then October. I ended up with one battle in October and this was my International Naval Wargaming Day game.

I rolled up the scenario and the forces for the game. The scenario set up said that a Japanese convoy was on its way down "The Slot" (AKA New Georgia Sound) with a moderately-sized escort. I had a force of four destroyers and five cruisers (four heavies and one light) to meet the enemy, so I felt like I had a good chance of out-gunning the Japanese. Knowing that there was a chance the convoy could move into the area east or west of Savo Island, I decided to split my force (Note: historically this probably would have been a bad idea, but knowing the way the game system works, and the fact that I'm not really putting my life on the line, give me an advantage over my historical counterparts). I decided to take two destroyers and four heavy cruisers around the east side of Savo Island, while the other two destroyers and the light cruiser went around the south and west sides of the island.
My general movement plans, but I was pretty sure it would change once the Japanese showed up
The game started out well, with all but one of the Japanese forces having their entry delayed. The one Japanese force on the map was headed straight toward my heavy cruisers and I felt pretty good about being in front of it. For those of you not familiar with the Tokyo Express game system, there are random chit draws during the turn to see when each side has the chance to detect the other side and for combat. This really randomizes what happens during the turn and you can end up with a wide variance of actions during the turn. For the most part during this game, the random draws fell in my favor. In this case the Japanese detection chit was drawn early, when we were still out of detection range, while the U.S. detection and Combat chits were drawn late in the turn.When the U.S. detection chit was drawn, I also had a lucky roll that allowed me to detect and fire at the newly found Japanese force. Drawing for the composition of the enemy force, I was happy to see that it was only a light cruiser and three destroyers (yes, they could still do a lot of damage, but I was glad it wasn't anything larger).
My detection of the Japanese advanced force
The attack that followed up the detection sank one destroyer, did medium damage to the light cruiser and another destroyer, and light damage to the third destroyer. Movement continued until Combat chit showed up, when the Japanese got a chance to fire back. But since they were already damaged, almost all their fire was ineffective. The lightly-damaged destroyer got off a torpedo salvo that damaged the heavy cruiser Chicago. My return fire was as effective as the first round, with my attacks sinking the cruiser and one destroyer, while leaving the last destroyer with heavy damage.
Combat damage at the end of the turn
The heavily damaged destroyer started to withdraw from the battle, while my heavy cruisers continued up the east side of Savo Island. After this initial combat, I kept to my movement plan, but I was starting to wonder if I should have my light cruiser force turn and join the heavies on the east side of Savo Island. At this point there was the convoy and ten unknown Japanese forces on the map, but I also knew that only one of the ten was going to be real (knowing the Japanese force levels and how they work is one of the advantages the U.S. player has in the game that the historical commanders did not have).

As the heavy cruisers moved up the east side of the island, they came into contact with the convoy and the final Japanese force, which turned out to be two more destroyers. Luckily for me, the way the heavy cruiser approached the Japanese destroyers made it hard for them to launch an effective torpedo attack. During the combat turn, Japanese attacks sank one of my destroyers, but missed all their other attacks. I concentrated my gunfire on the convoy, since sinking the convoy was my main mission, and let the destroyers fire at the Japanese destroyers. Because of the gunnery angles blocking fire from some of my cruisers, I also took some pot-shots at the heavily damaged destroyer. I did some heavy damage to the convoy and sank the heavily damaged destroyer. 
Convoy in sight!
At this point I was worried the convoy was going to slip by me, so I ordered the heavy cruisers to start turning back to the south and ordered the light cruiser group to turn around to come up the east side of Savo Island. What I didn't know was that the Japanese had issued orders to withdraw from the area. This caused a little bit of strange (and seemly confused) movement for the Japanese that put their destroyers in a really bad position to attack my force or protect the convoy. During combat I continued to pound away on the convoy and took a few shots at the destroyers, doing damage to both. The Japanese destroyers fired on my destroyer, but missed.
The convoy trying to disengage to the northeast, while the escorting destroyer move to the northwest
The Japanese withdrawal order also put me in a bad position to try to catch the convoy, but I was able to sink it just before it had a chance to exit the area.

Tallying up the damage, I sank the Japanese convoy, one light cruiser, three destroyers and did moderate damage to another destroyer. On my side, I lost one destroyer and had light damage to a heavy cruiser (it will be out of action for one month while it repairs the battle damage). Overall this turned out to be a substantial victory for the U.S. and puts me on a good road for an overall campaign victory.

Next year International Naval Wargaming Day will be on a Monday, which will make it hard to have a game on that day. But, hopefully, I will be able to arrange something for the weekend before.