Showing posts with label Rules. Show all posts

Sunday, January 7, 2018

Rules/Book Review: Wargaming the Spanish Armada

I’ve been intrigued with the Spanish Armada for some time. There are a number of interesting books and games available on the subject and I have some Armada boardgames, but I’ve always been little reluctant to get into gaming the era with miniatures. I decided to spend a little Christmas gift certificates to get a copy of the Spanish Armada book in the Battle of Britain series of book-games.
The Spanish Armada book cover
Each book in the Battle for Britain series, there are seven all-together (and they are launching a Fleets in Profile series this year), covers a different war in British history. Each include profile illustrations of soldiers and weapons to cut out, along with easy to play wargame rules. The Spanish Armada book has all the major ships you need to recreate the navies that clashed in the English Channel in 1588 and has instructions on how to cut out and assemble them. It also includes a coastline, islands, and a sea surface with squares for playing the game. The rules are quick and easy to play, but still show the differences between Spanish and English ships and tactics. The book also includes short descriptions of the overall campaign and the different ships on each side, along with tactical suggestions for ship captains when playing the game. There are six scenarios in the rules (four historical, one hypothetical, and one generic) and a campaign game. So, there is really a lot packed into book.
Spanish Fleet description from the book
To start a game, you need to have your play area and ships, along with some six-sided dice for combat and a deck of cards for determining the wind information. The turn sequence for the game is Spanish move and shoot, then the English take their turn and can move and shoot or shoot and move. Movement is pretty basic with most Spanish ships only able to move one square, while most English ships can move two. If you are playing with the Orders rule, you roll a die at the start of the turn to determine how many ships you can move. There are also movement limitations based on the wind speed and direction (determined before the start of play). One interesting rule is that the Spanish transports don’t normally move during the game; they only move if they are hit by English gunnery. This does make games more fun that just doing the typical stern chase.
A page of English ships (click on the image for a closer look)
The movement information, damage and gunnery information for each ship type is summarized on a card.
Ship summary cards
For gunnery combat you roll a number of six-sided dice based on the firing ship type and range, with sixes being hits. When ships take enough hits, they become crippled and no longer move and can be forced to surrender. The English automatically reload their guns when they move, while the Spanish roll to see if they reload their guns. So, the Spanish have to think about when to fire their guns. There is also a rule for Spanish boarding (the English cannot initiate boarding). But a Spanish ship has to be in the same square as an English ship to try this and that isn’t very likely.

The campaign plays through a series of scenarios as the Armada moves through the Channel giving each side options for attacking the enemy (including a chance for the Spanish to attack ports or invade from Flanders). There are chances to resupply and repair your forces between battles too.

I haven’t cut out any ships yet, but I did play a couple battles with some stand-ins and the game played quickly and smoothly. There is a rules summary sheet, which I referred to when first getting started, to help with any basic questions.

The Spanish Armada book gives you ships, easy-play rules, and a basic history all a comprehensive little package. The author also gives you permission to copy the pages, so that you don’t have to cut up the book. Overall, I was pretty happy with the game and think this is a worthwhile purchase.

Sunday, October 6, 2013

Looking at Rules: Sailpower 2.0

In my search for a good set of rules of rules for my 15mm Age of Sail ships, I go in on the Sailpower 2.0 Kickstarter (you can read my impressions of the Kickstarter items in a previous blog post). I'm finally getting around to posting my thoughts on the rules (note that this review is based only on a couple solitaire games).
The Sailpower 2.0 rules comes as a 138 page printed book. However, don't be put off by the size of the book, it has lot of examples along with tables and optional rules. The basic rules aren't really that heavy and don't take up a lot of the rulebook. The rules are designed for use with 15mm (approx. 1/100) scale ships, but there is a page covering scale conversions if you want to use a larger or smaller scale. Ranges in the game are measured in inches and the game uses a D20 for all rolls (you will need a lot of them if your ship has a lot of guns). The rules are meant to cover sailing actions from the Golden Age of Piracy all the way through the Napoleonic Wars.

Before starting a game players need to fill out a log sheet for their ships. The log sheet has information about the ship's sailing speed for different wind directions, information about the ship (hull points, masts, etc.) guns, and crew. The rules provide this information for a wide variety of ships, from small gunboats all the way up to 1st Rate ships such as HMS Victory and the French Ocean class.

Turn Sequence: Each game turn has four phases: 1) Ship Movement, 2)Combat (ship-to-ship and ship-to shore), 3) Crew Actions, and 4) Record Keeping.

Ship Movement: During this phase the players check for a change in the wind direction, then plot their movement on the log sheets, and finally move their ships.

The distance ships move is determined by their initial relation to the wind at the start of the turn, but can change if the ship changes course during movement. If during movement a ship turns so that the movement rate would be lower than the starting movement rate, some movement is lost and vice-versa if the movement rate increases. The rules have a good example of this, so it shouldn't be too confusing, even for new players. Ships can make a turn (up to 45 degrees) at the start of movement, at the end of movement, and after traveling a certain distance, referred to as the Turn Delay, based on the ship stats. Ship must have a minimum number of crew allocated to sailing the ship (or rowing) and if the crew number falls below this value, the ship simply drifts.

One thing I don't think the rules cover very well is tacking (turning through the wind). The rules basically simplify this task and don't really have rules for getting stuck in irons (heading directly into the wind) other than the ship doesn't move. There also isn't any real difference in crew quality when it comes to sailing.

Combat: After movement, players can fire their guns at other ships and shore targets. First you roll a die for each gun that fires to see if it hits (this value is modified but if you roll a 10 or higher on a D20 you hit). Then, for each gun that hits, you roll for damage and mark that off on the target.

The game has 13 different gun types from rail-mounted swivel guns all the way up to fortress guns. There are also rules for mortars. Each gun type is rated for point blank range, an optimal range, and a drop distance. You get a To Hit bonus if you are within point blank range. If you are over optimal range, you get a negative To Hit modifier for each additional drop distance to the target. The drop modifier is an interesting way of handling maximum ranges, since you can always fire your gun, it just has a lower chance to hit the farther the target. There are some other modifiers too, but they are all fairly common (like ship size).

Each gun type also has a number of crew needed to man it. If the gun has half the needed crew, it can only fire every other turn. If you have less than half crew, you can't fire. Guns can be aimed at the rigging, hull, or deck (where the crew hangs out) and there are different kinds of ammunition, including bar and grapeshot.

Overall, I like the gunnery rules. There are enough different gun types and crew is an important component in firing. The only problem I can see is if you are fighting with larger ships, then you will have to roll a lot of dice.

Crew Actions: After combat, crews can fire small arms, grapple/board enemy ships, and repair their own ship. These are all fairly easy to understand actions, but the players must allocate crew to do them.

One thing I expected to see here was some sort of morale check for a ship, but the rules don't really have rules for checking morale or striking.

Record Keeping: During this phase players check on ship damages (fires, explosions, sinking ships, etc.). Then the turn starts all over again.

That covers the basic rules for the game, but in addition to those rules there are Faction Rules that add special characteristics for ships based on the crew. This is a nice addition, since I like rules that show the difference in naval crews.

There are also optional rules that cover ports (including visiting taverns and recruiting crew), forts, and treasure hunting. All of these are nice add-ons and probably will be a good selling point for gamers that want to play some pirate actions.

Overall it seems like the rules play pretty fast and should work well for a good number of ships and players. It seems like they were created for convention pirate games, so I would expect that to be the case. Although I could see things dragging a bit if there are too many large ships in a game. The sailing rules aren't the strong point for the game, but that isn't too surprising if the main focus was on convention pirate games.

The Sailpower rules are available on Amazon.com or through the Sailpower retail partner, The Soldiery, in Columbus, Ohio. You can also purchase ships and other game accessories through The Soldiery. There is a link to products on the Sailpower blog/website, which has photos of the different ship types available and information for contacting The Soldiery. The blog/website also has optional rules, FAQs, and downloads.

Pros: It should play fast, as long as there aren't too many big ships. I like the different gun types and focus on crew allocation for actions. Should be good for convention games.

Cons: I think the sailing rules could be better (it wouldn't take much to improve them) and there should be a crew morale system.

Sunday, December 4, 2011

Looking at Rules: Sail and Steam Navies

Since this year’s DANG mini-campaign is an American Civil War river action, I needed to find a set of rules to handle this type of action. Usually, we use the old Yaquinto Ironclads rules (converted for miniatures) for ACW naval games, but it can take a while to play out actions with those rules. Fortunately, Kevin had recently purchased Sail and Steam Navies from Bay Area Yards and he was willing to let me borrow them for DANG. This rules review is based on reading the rules and playing two fairly large battles (each with four or more ships per side).
Sail and Steam Navies, subtitled: Naval Battle System 1840 to 1880, is a PDF set of rules that comes on a CD. Also on the CD is a module covering the American Civil War called Under Both Flags. The rules are designed for 1/600 scale miniatures, but come with information for converting them for use with 1/1200 scale miniatures. The basic rules are about 40 pages long, which includes charts, an example of play, and conversion information for 1/1200 scale. The Under Both Flags module adds six scenarios, a scenario generator, and the forms for the ships. There are over 550 pages of forms (generally with two forms on a page) included in the game covering pretty much every ship involved in the American Civil War (at least the ones that fought in battles or are mentioned in the various histories) and a number of forts and shore batteries. There are multiple forms for many of the ships the show changes in armament while in service. The forms are attractive, well laid out, and have all the gaming information for a ship. The only thing I wish is that there was more information on how to come up with your own forms (mainly because I like to tinker around with things), but that is a pretty minor quibble considering the large number of forms.

The game uses D10s for resolving combat and other actions. Usually you will only need one or two dice, but there might be times during damage checks when you will need a handful of them.

The turn sequence is pretty straightforward; it starts with writing speed orders for the turn (this is just writing down how fast a ship will go for the turn, not actually plotting movement), followed by combat (cannon fire, musket fire, boarding/melee), then movement, and finally morale checks and repairs.

The game includes a really good player aid page (which is easy to print out) that lays out all the game information in a clear manner. Once you are familiar with the rules, I think you really only need the player aid chart and ship forms to play the game.

Gunnery: Cannon fire in the game is pretty easy. Guns are broken down into groups of light, medium, and heavy smoothbore or rifled guns. Each group has a set close, medium, and long range, which determines the Hit Number. The player declares if they are firing solid shot or a shell and rolls a hit die and location die, with the hit die result being modified by various game, firer, and target conditions. If the modified roll is equal to or greater than the Hit Number the target ship is hit and the location die is used to determine what part of the target is hit. The location numbers are shown on the target ship's form, so there is some variation between ships. The location roll can also be modified if firing through the bow or stern arcs of the target, which prevents cases of hitting the bow of a ship when firing from the stern aspect.

If the target is hit, the armor rating for the location subtracted from the modified gun rating for the firing gun. The gun rating is listed on the attacking ship's form and is modified based on range and if the gun is firing shot or shell. The result is the number of damage dice that are rolled (Note: you always get to roll at least one damage die, even if the armor rating is greater than the modified gun rating). This is where you might need a lot of dice, especially if you are firing a big gun at a wooden vessel at close range. The damage dice cause damage on a roll of 8 or higher; with the damage being Suppression (affecting the crew), armor, or hull hits. There is also a chance of taking out a gun or scoring a critical hit if three dice come up with the same number. (so, there is no chance of destroying a gun or causing a critical hit if you roll fewer than three dice).

Damage results are pretty easy too. Ships have armor at the different locations(including stacks, and paddlewheel boxes) and hull boxes. The hull boxes are divided into upper and lower hull types. There are always fewer lower hull boxes and if all of those are marked off the ship begins to sink (the lower hull boxes are marked off due to ram and torpedo attacks or for hull hits on the lower portions of the ship). The damage to armor and hull is marked off as needed.

There is a phase for musket fire, which is handled in a similar manner as cannon fire but only causes crew suppression, and a boarding/melee phase for those rare boarding actions.

Movement: Movement in done in two rounds. In each round one side, determined by initiative die roll, moves all of its ships and then the other side moves. The same movement order is repeated in the second round. Ships must move the full distance they wrote in the speed orders at the start of the turn, unless damage has reduced their maximum speed. For turning, each ship is rated for a distance it must move straight before making a 30 degree turn. The turn distance is on the ship's form and can be modified for paddle wheel damage or rudder damage.

During movement ships can attempt to ram with each other. If a ship hits another at a shallow angle, then it is a glancing blow and minor or no damage occurs. If not at a shallow angle, a roll is made to see if the ram is successful. If not, then it is treated as a glancing blow. If successful, a number of dice equal to the ramming ship's speed are rolled. The die rolls are modified by the size and ram value of the ramming ship and the armor value for the defending ship at the point of impact. Higher die rolls cause hull hits to the target and lower rolls cause damage to the attacker, with middle rolls not causing any damage. Spar torpedoes are handled in a similar manner with the attacker checking for success in the same manner as a ram. If successful, three dice are rolled for damage.

There are also rules for sailing ships in the game. I haven't tried these rules yet, but they seem pretty easy to understand (even the rule on Tacking). I like the idea of being able to use sail and steam ships in a game without having to worry about using different movement systems.

The two consecutive movement rounds in Sail and Steam Navies seems a little odd when compared to most rules. I think the rules make ramming a little easier than in similar games, with no worries about getting shot until the next gunnery phase. In a lot of rules that have multiple movement rounds, the movement rounds are broken up with an intervening combat phase, giving the target a chance to break up a ram attack by firing at close range. In Sail and Steam Navies ships have a chance to move from medium gun range (or even long range for smaller smoothbore cannon) to ramming without being shot at. I will say that I don't think this ruins the game, it just makes you think differently about the tactics you want to employ.

After movement are the Morale phase. Ships checking morale for certain cases (such as losing half its hull boxes or having no movement). The first failed morale check causes the ship to withdraw and a second failure causes the ship to surrender. Additionally, a ship that has all of its suppression boxes marked off will surrender. The last phase in the turn is the Repair phase, where players check to repair damaged systems, put out fires, refloat grounded ships and grapple/ungrapple. Then the turn sequence starts all over.

The rules play pretty quickly and have enough detail that players can see the differences between ships without getting to bogged down. Most players won't have any problems quickly understanding the combat and movement rules. Overall, I like the rules and have been happy with the way they played. I would recommend them to anyone interested in ACW naval games.

Pros: The Player Aid page is top notch! The rules come with copies of all ship forms ready to print. Should be easy to play in a large group or at a convention.

Cons: There are some places where the rules could have been explained better. The PDF ship forms are not searchable in your PDF reader, so it can be hard to find the exact ship card you want (there is an Excel file on the CD that is searchable, but it doesn't have the page numbers in it). There isn't any way to modify ship forms or information on how to convert real-world numbers into ones for the game.

Saturday, August 27, 2011

Looking at Rules: Kiss Me, Hardy

In my search for a good set of rules of rules for my 15mm Age of Sail ships (you can read about other rules here, here, and here), I finally decided pick up a copy Kiss Me, Hardy from Two Fat Lardies (TFL). The Lardies have a good reputation for their rules, so it seemed like a low risk purchase. With that in mind, here is my overview of the Kiss Me, Hardy rules (I should also note this overview is based on reading through the rules and some solo walkthroughs of a game).

Kiss Me, Hardy comes as a 50 page PDF file, but there is a lot of white space and partial pages so the rules aren't really that heavy. The rules are designed for use with 1/1200 scale ships, but the author says they can be used with other scales. However, I don't think he was thinking about the 15mm ships, which is what I am looking for. Ranges in the game are measured in cm (but I expect you could modify this if needed) and the game primarily uses D6s, but there are times you will need some other dice.

Like other TFL rules, there isn’t a set turn sequence; instead a deck of cards (you have to make these yourself) is used to determine what action is taken. There are cards for checking wind change, resolving boarding actions, and each squadron/formation has a Move card and Fire card. When a card is turned up that action is resolved. However, a player can hold back their Fire card for use later in the turn, but it must be played before the next turn.

For movement, each ship rate (based on the number of guns) has a base movement number ranging from 10 cm for 1st rates to 16 cm for small ships (sloops and cutters). The base movement is modified by die rolls (D6s) based on the wind position for the ship. Turning is handled through the use of a turning circle. There are special rules for tacking (turning through the wind), maintaining formation, and collisions. Overall, the movement rules are pretty easy to deal with.

For firing, the base number of dice (D6s) for broadside firepower is based on the number of guns on the ship, ranging from 14 dice for 120 gun ship to 2 dice for a ship with less than 20 guns. The base number of dice is modified by crew quality, if you are firing a full broadside, and a few other factors. The “To Hit” roll is based on range. In addition to the normal fire dice, you also roll a D10 for special damage. If the D10 roll is less than or equal to the number of hits rolled, special damage is checked on the target. When firing, the player declares if they are shooting at hull or rigging and each hit does 1 damage point. Ships hull hits are based on the number of guns they carry (a 74 gun ship has 74 Hull hits and a 36 gun frigate has 36 Hull hits). For rigging, ships have Primary and Secondary boxes based on their movement (there are three Secondary boxes in a Primary box). Most rigging hits mark off Primary boxes, but sometimes Secondary boxes are marked.

Once ships start taking damage, there will be times when the ship is required to make a Strike Test (basically a morale check). If the ship fails the test, it must retire from action or (in certain cases) will surrender to an enemy ship.

If two or more ships are locked together, they can fight a boarding action (when the appropriate card is turned). Each side rolls D6s (1 for every 10 remaining Hull hits) and adds them together, with the highest total winning the stage. This continues until all the decks on a ship are taken or the defenders throw the attackers back.

That covers the basic rules for the game, but there are also rules anchoring, running aground, small boats, galleys, fireships, bomb vessels, shore batteries, static defenses, and even land actions.

Another good rule (in my opinion) is the Ship and National Characteristics rule. This covers crew quality breaking crews into three groups (Jolly Jack Tars, Sans Culottes, and Landlubbers). Each group can further be broken down into Elite, Average, and Poor (exception, there are no Elite Landlubbers). I really like this rule since it gives eight basic crew levels without adding a lot of rule text. Another nice touch is the optional rule for modifying vessels, which allows for some further customization of ships.

The rules play pretty fast and should work well for large and small fleet actions.

Pros: Quick play, random turn sequence, different crew types, and lots of optional rules. Probably good for convention games.

Cons: Standardized ships and guns (this is okay for the scale used), PDF download (this can be a pro or con depending on your point of view).

Sunday, April 3, 2011

Time for a little gaming

Rather than spending time working on my stuff, I spent part of yesterday helping my friend Kevin playtest his Battle of Sluys scenario for Enfilade. we were joined in the playtest, by Mark and Joe Waddington. You can read more about Kevin's work on this project on his blog and just click the "cogs" label to see the whole story.

The English and French Fleets square off at Sluys.
Kevin is using David Manley's Quick Play Medieval Fleet rules for the game and yesterday was the first chance to test out the ships, terrain, and rules. The rules are somewhat like DBA, in that a turn consists of one side rolling for command points, allocating them by formation, moving, and then conducting combat (artillery, missile, and close combat) followed by the other side doing the same. Overall, pretty easy to understand, but with enough decisions to keep players in the game.

We set up the forces, with Mark and Kevin as the English and Joe and I playing the French. The French set-up in the middle of the channel between the mainland and an island. We also started the game chained together and can't unchain until 3 turns after the first French ship takes damage, so there really wasn't a lot to do for the first few turns but wait. Joe ran the French front line, while I took the third squadron in the back, which was a mix of mercenary galleys and medium cogs. 
The initial setup for the French fleet.
Before the start of the game, Kevin sprang a little surprise on us. He told us that overnight the French fleet had drifted toward the island on our right. So, all the sudden there was a big gap on our left flank. The English moved up with two groups to engage the French front squadron with artillery and later missile fire, while the third group tried to move through the gap on the French left. Unfortunately for them one of their cogs kept running aground in the shallows, forcing the group to stop before pushing ahead.
The fleets locked in battle as an English squadron tries to move through the gap (at the top of the picture).
This delay allowed time for my third squadron to unchain and move to block the gap. I was able to defeat the first group of English cogs in close combat.
My galleys plug the flank gap.
Then I pushed on into the flanking squadron taking out the squadron commander. 
The galleys counterattack!
This was the schedule time for the Flemish fleet of small cogs to appear in the French rear. However, by this time things weren't looking good for the English and the Flemish had to sail into the wind to reach the French line. We stopped the game, ate some pizza, and talked about potential changes for the scenario. Kevin took a few notes and after he sorts things out, I expect we will give it another play through.
In addition to seeing Kevin's cogs, I got a chance to look at ships Mark is scratchbuilding. It was around a year ago that Mark was thinking about scratchbuilding some ships for the Great Lakes during the War of 1812. I think he was originally planning to do the ships for the Battle of Lake Champlain, but I talked him into working on ships for Lake Ontario. He has been cursing my name ever since, but the ships look really nice. They are 1/600 scale from wood, with metal masts, and I'm looking forward to getting a chance to play with them.
Mark's Lake Ontario War of 1812 ships.

Tuesday, August 17, 2010

Looking at Rules: Limeys and Slimeys

In the final installment of my rule overviews, I'll look at the Limeys and Slimeys rules. (I wanted to include a photo of the rules cover, like I did with the other overviews, but there really isn't a cover. So, enjoy this picture I found while searching for sailing ships on the Internet.)

Limeys and Slimeys
Limeys and Slimeys is an older set (copyright 1990) of quick-play naval rules. I think they were originally included with ships from the miniatures line of the same name. You can still get the rules, crews, and some ships from GFI Minifigs in the US (look under the 15mm Renaissance heading for the figures and rules). The rules are about four pages in length and there is a two-sided quick reference sheet. The rules do have some suggested values for hull, rigging, and crew sizes. In addition to the play area, miniatures, measuring devices, you will need a number of six-sided dice, and a way to record hull and rigging damage. Unlike the other rule sets I've been looking at, the small crew sizes in Limeys and Slimeys let you use 1 figure for each crewman (the largest ship they suggest is a 14 gun ship with 24 sailors and 4 officers, to which you could add in 8 Marines with a Marine officer).

The turn sequence is pretty easy: Roll to see who moves first, First player moves, shoots, and resolves boarding, and then the next player moves, shoots, and resolves boarding.

Movement is done in two legs at a rate of 3 or 6 inches per leg (depending on how you are facing with the wind). Turning is done in increments of 45 degrees after a movement leg and there is a rule for tacking through the wind (with the chance of getting hung in irons). One interesting twist is that you can actually gain speed after your turn if you put the wind at your back.

Gunnery can happen any time during the moving player's turn (no opportunity fire here). Guns are basically classed a long guns or carronades. Long guns shoot out to 24 inches and do one point damage for each hit. Carronades can only fire to Short range (6 inches), but do double damage when they hit. There are three basic range bands: long (24 inches), short (6 inches) and Point Blank (3 inches). When a player is ready to fire, they roll one die for each gun firing, check for hits, and then roll damage for each hit. When a ship loses all of its Hull boxes, it sinks. I couldn't find a rule for morale checks, but the reference sheet mentions that a ship must make a morale check (1-3=strike, 4-6= fight on) when all the officers are killed.

Boarding is handled by closing to Point Blank range and trying to grapple with an enemy ship (they get a chance to un-grapple). If the grapple is successful (or the ships were fouled in some other way), you can send any crewmen not involved with the grappling to the boarding party. Both sides add up their figures, with Marines and officers adding two points and regular sailors adding one. Then a die is rolled, the number is multiplied by the total for the crew, and then divided by ten. The side with the lower score loses that value in crew, Marines, and Officers. The loser is pushed back one 'deck' with ships usually having two decks. If a crew loses the last deck, the ship is captured. If the attacker loses any round they are pushed back to their own ship.

Limeys and Slimeys also includes rules for anchoring, repairs, and small boats.

Overall it packs a lot of information into the four pages of rules and it looks like it would play nicely. If you want a quick play set of rules, these look like a good way to go. Here is a short list of the pros and cons I saw with the rules.

Pros: fast playing without much bookkeeping and the rules enough period flavor to work. Probably a good set of rules for convention games.

Cons: Not much differences between guns and it seems like ships may be sunk pretty easily, but that is just my impression without playing.

Monday, August 16, 2010

Looking at Rules: Away, Boaders!

In this post I'll be looking at the Away, Boarders! rules.


Away, Boarders!
Away, Boarders! is a free set of rules from the War Artisan website. The rules cover naval warfare on the Great Lakes during the 18th and early 19th Century. The rules don't really give a scale, but are meant to be used with the 1/300 scale paper ships, although the author does say they can be used with any scale. The rules are about 13 pages long (including instructions for creating your play area) and the zipped download file comes with the rules, markers, and tables. There is a separate zipped file for the ship displays for the Battle of Lake Champlain in 1776 (probably better called the Battle of Valcour Island so it isn't confused with the battle during the War of 1812). In addition to the play area, miniatures, and ship displays, you will need a number of six-sided dice (the rules recommend a half-dozen).

The rules start out by explaining how you set up the field of play by putting points (dots) on the play area in a basic hexagonal pattern. The distance between the points is based on the size of the largest ship model in your game. The rules then explain the layout of the ship displays and how to use the markers with displays.

The sequence of play is: Crew Assignment Segment, Action Segment with three Action Phases, and Crew Task Segment.

During Crew Assignment players move their crew markers to different sections of the ship display to show the actions they are taking (working with sails, loading guns, repairing damage, etc.). Then each ship determines its current speed, based on the ship rating, sail setting, and facing compared to the wind. Movement and gunnery are done in the three Action Phases. The Action Phases are basically movement impulses with ships taking zero, one, or two movement actions depending on how fast they are moving.

After moving, any ship can fire its guns and all damage is recorded simultaneously. Ships can choose to aim high or low with damage based on the number and size of the guns, the range to targets, and gun load (standard shot, double shot, grape shot, or chain shot). Guns in range will basically always hit, with the number of hits (damage) being varied by a die roll. After determining the number of hits, you roll to see hit location. When a ship loses all of its Hull boxes, it sinks. I didn't see any morale rules in Away, Boarders!

Boarding happens after movement when ships grapple or are fouled. If boarding occurs, only the crew members assigned to board/repel boarders count during the fight. Boarding is resolved by adding up the number of crew assigned (officers count double and the rules don't cover marines) and rolling a die. The side with the high total wins and the losing side places one crew marker in the casualty box. If the boarding party outnumbers the remaining crew by 3 to 1, the ship surrenders.

One interesting aspects to these rules is that when the crew takes hits they are placed aside as crew casualties and instead of being eliminated they can be returned to action by the ship's captain rallying them. This rule and the crew assignments gives Away, Boarders! a different feel than most rules where you don't really care about what is happening with your crew. I sort of like this aspect of the game, since ordering your crew actions seems like it should be more important with the smaller scale actions.

Overall the game seems like it will be pretty easy to play. There are a some aspects to the gun damage that I not too sure about (the shot weight is a modifier for damage, but the modifier can't exceed the number of guns firing. So a single 32 pound gun would do the same amount of damage as a single 6 pound gun, which seems odd). But there are aspects of the rules I like and I'm looking forward to giving them a try. Here is a short list of the pros and cons I saw with the rules.

Pros: ship displays and markers, crew assignments and handling, guns are differentiated by size/weight and boarding actions are quick and easy.

Cons: uses point-to-point movement instead of free-movement, no rules for changes in wind direction/speed, and no information on how to come up with ship displays for ships not included in the Lake Champlain file.

Next up Limeys and Slimeys

Sunday, August 15, 2010

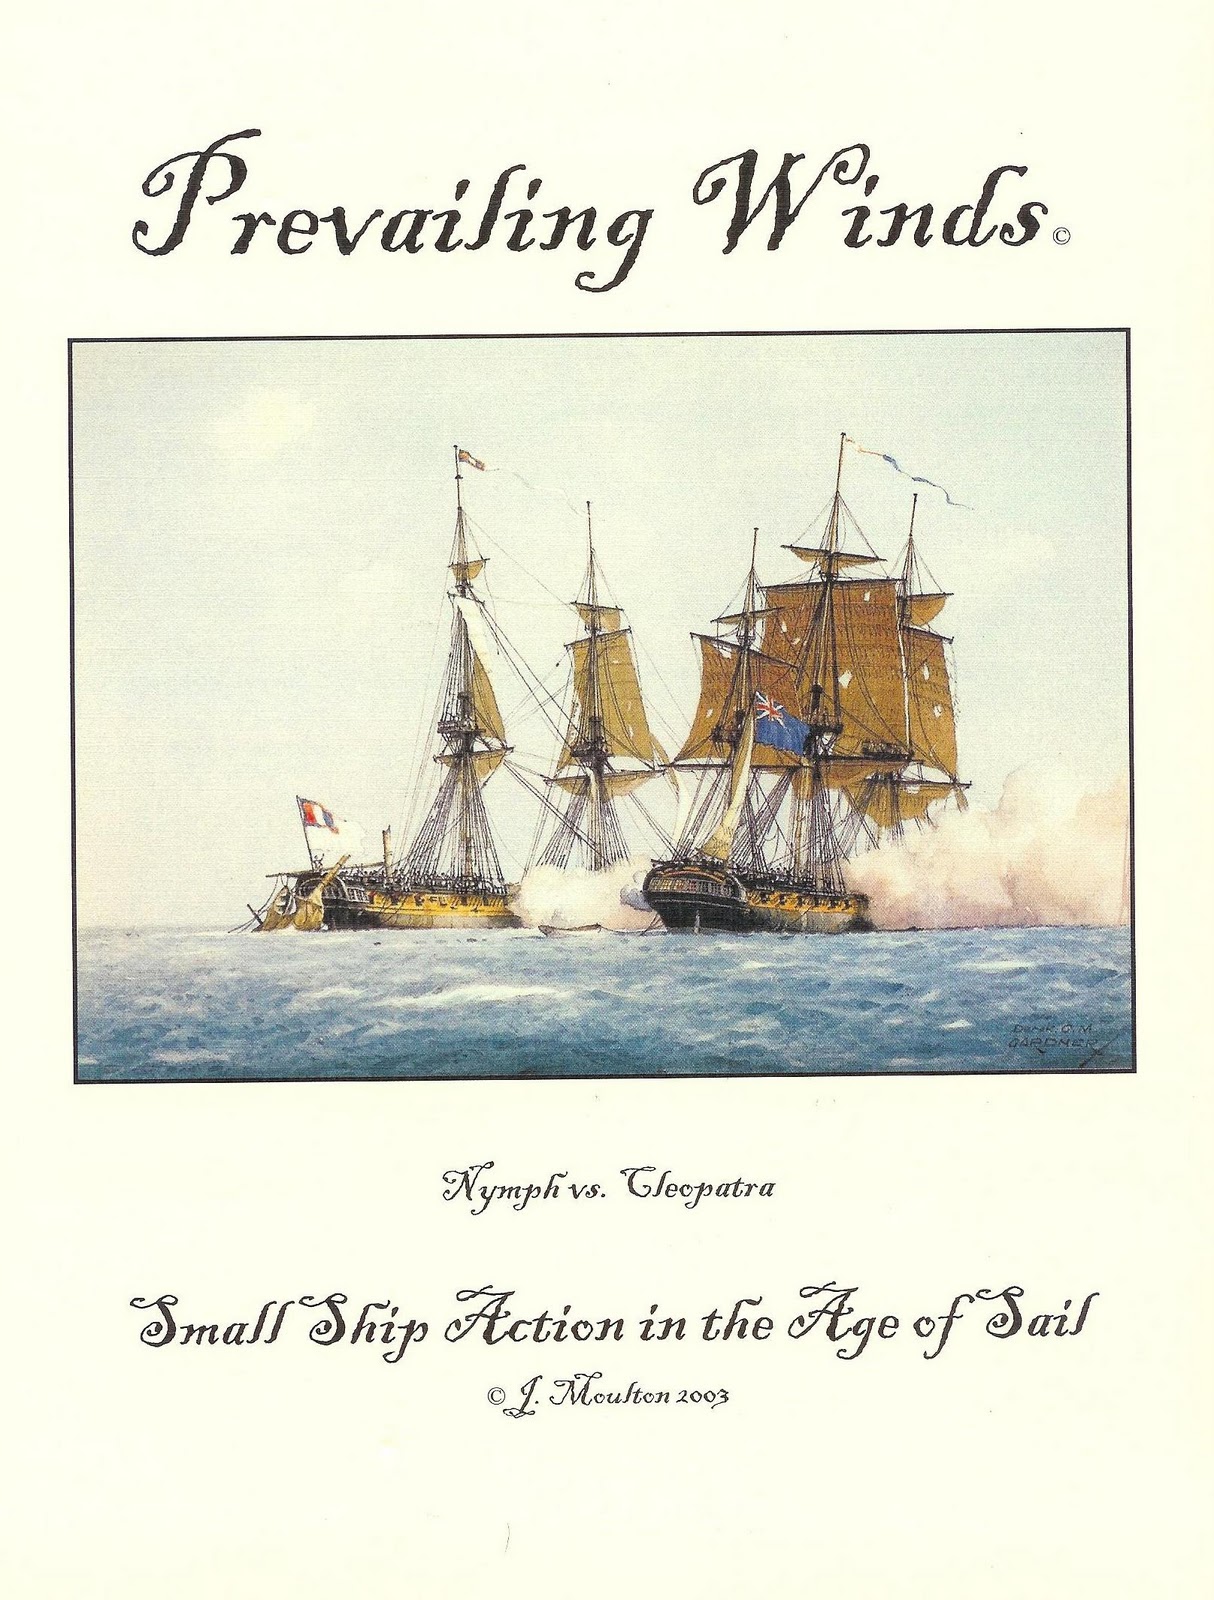
Looking at Rules, Prevailing Winds

I've been looking through several rule sets for my 15mm Age of Sail miniatures and I'm currently focusing on three sets; Prevailing Winds, Away, Boarders!, and Limeys and Slimeys. I'll do a quick overview for each set of the rules

One note about these overviews, they are based on the just reading through the rules and some solo walkthroughs of the rules. I haven't contacted any of the authors with questions and haven't tried a real game.

Prevailing Winds
First off I'll cover the Prevailing Winds rules from Thoroughbred Figures. This set of rules looks to be specifically made for Thoroughbred's 15mm Sea Eagle line, but the rules say they can be used with 1/600 scale ships by halving the distances (range and movement). The rules are about 10 pages long (there are more pages in the booklet, but the rules are really only about 10 pages) and include 3 cardstock reference cards, 1 addendum sheet, and 16 prefilled ship logs for the Burlington Races battle on Lake Ontario during the War of 1812. In addition to the play area, miniatures, measuring devices, and ship logs, you will need a number of 20 sided dice (these are used for most die rolls in the game), a couple 4 sided dice (for resolving boarding actions) and a deck of cards.

The turn sequence is: Check weather (both direction and strength), Receive new cards (each ship has two or three cards), Captain's Conference (Captains get 5 minutes to plan for the turn), Fight Fires and take fire damage, Allocate crew actions, Place and reveal cards (high card moves/attacks first), Movement/Gunnery, Repair Damage, and Check Morale.

The deck of cards is used to determine the movement/gunnery order for the turn. Each ship gets a hand of two or three cards at the start of the game and players select a card from their hand for movement/gunnery with the high card going first. Ships move in two legs during the turn, with the distance moved in each leg determined by base speed for the ship, sail setting (it can be full, battle, or furled), facing to the wind, and wind speed. Movement scale is 1 knot = 2 inches of movement. Turn are done in increments of up to 45 degrees with square-rigged ships getting one turn per leg and fore-aft rigged ships getting two per leg. There is a minimum distance ships must move between turns and turns cost 1/4 ship speed to complete. Ships turning through the wind (tacking) have to check to see if they are able to complete the turn or if they get hung in irons. Movement seems pretty easy, but there is some calculations required to determine your initial speed.

Gunnery can happen anytime during movement and ships that aren't moving and haven't fired are able to shoot at moving ships. Gun ranges and hit chances are broken up into Long, Effective, Short, and Point Blank categories with different size/type of guns having different ranges. For example a 24 pound long gun has a long range of 96 inches, while a 24 pound carronade has a long range of 30 inches, and a musket has a long range of 8 inches. Gunnery execution is pretty simple, you measure the range, roll one twenty-sided die for each gun firing, add in any modifiers, and comparing that to the range. If a cannon hits, the amount of damage done depends on the hit location for the gun load (shot, double-shot, bar/chain, grape, or canister) and size of the gun. Damage is marked off on the ship log and you check for critical damage each time the ship loses 1/4 of its hull or rigging. The crew checks morale each time the ship loses 1/4 of the crew or if all the officers killed. If the crew fails the check, the ship strikes.

Boarding can also happen during movement, if the moving ship can get into grappling range (4"), successfully grapples, and the defender does not un-grapple. If boarding occurs, each side allocates crew to the action, adds up the numbers for the allocated crew (Marines, officers, and attacking Barbary corsairs are worth double normal sailors), rolls a d4 modifies the roll and multiplies the modified die roll with the crew numbers to come up with a total. The totals for each side are compared and the loser marks off crew equal to the difference. Additionally the loser is pushed back one 'deck' with ships having a different number of decks based on their size. If a crew loses the last deck, the ship is captured (attacker are repulsed back to their own ship). As you can see, boarding might get a little complicated.

That about covers the basics of the rules. Prevailing Winds also has rules for rowed ships, ships boats, and a few other things.

Overall Prevailing Winds seems like it covers all the important aspects of naval warfare in the late 1700s - early 1800s. The rules seem to fit in with my needs for fighting out small ship (frigate and smaller) actions, while showing the differences between various ships and guns. I'm looking forward to trying them out. Here is a short list of the pros and cons I saw with the rules.

Pros: Differentiates between the sizes and types of guns, crews have a function in the game, and differently rigged ships have different sailing characteristics.

Cons: Might be too bookkeeping heavy for some gamers, no information on how to come up with ship logs for ships not included in the rules, and some of the errata/addendum information is a little confusing.

Next up the Away, Boarders! rules.