Sunday, November 29, 2015

DANG 2015 - Planning

As I mentioned in my previous post, this year’s game for DANG is The Shores of Tripoli: US Navy vs. Barbary Pirates. The game will cover the attacks by the U.S. Navy on Tripoli harbor in early August 1804, which was after the capture and subsequent burning of the frigate USS Philadelphia. To get things rolling I started figuring out the order of battle for each side in the game.

Order of Battle Thoughts

During the time in question, the Americans had a squadron that included one frigate (USS Constitution), two brigs (USS Argus and USS Syren), and three schooners (USS Enterprise, USS Nautilus, and USS Vixen) along with six borrowed gunboats, two borrowed mortar boats, and a captured ship (which had been renamed Intrepid). During August, the gunboats and mortar boats bore the brunt of the action, while the other ships provided long range gunnery and crews for the smaller ships.

It was little harder to come up an accurate list of forces for Tripoli for this battle. But most places I looked said that Tripoli Harbor had a brig, two schooners, two galleys, and nineteen gunboats providing defense. There were also a number of forts and shore batteries protecting the city.

So my plan for the American forces was to go with the six gunboats, two mortar boats, and one schooner. For the Barbary forces I decided on one brig (actually a felucca substituting for the brig), a schooner, ten to fifteen gunboats (depending on what ships I could find), and a fort.

Overall, this seemed like a good amount of ships for the game, especially since I don't expect all the ships to be on the table at one time. I also thought I was in pretty good shape for having or easily getting most of these ships. My friend George offered to work on the American gunboats and mortar boats (more on that later), so I started working on the Barbary ships.

Barbary Ships
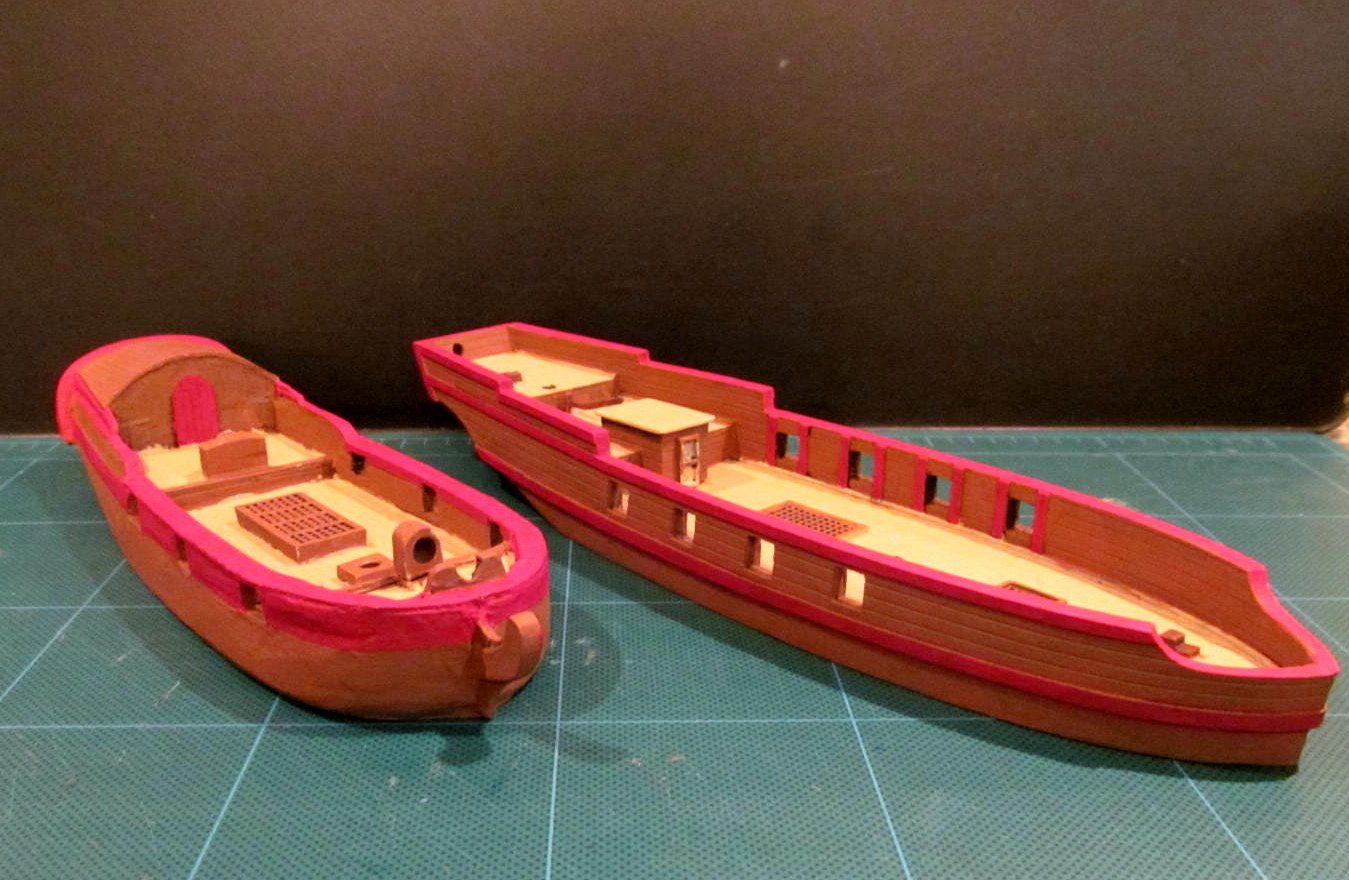
For the brig, it was an easy decision to use the Felucca I had already purchased from Thoroughbred Figures Sea Eagles line. The schooner is the Bermuda Sloop model from Sea Dog Studios, although I might give it a temporary lateen rig for the game. The gunboats are going to be a mix of scratchbuilt and purchased boats. I built eight of my own gunboats, have five on order, and will use the Old Glory Gunboat #5 models I purchased this summer for the others. Below is a photo of the mostly painted Felucca, Bermuda sloop, and a couple of my scratchbuilt gunboats.
The felucca (back), Bermuda sloop (left) and scratchuilt gunboats
All these ships still need a little detail paintwork along with their guns and masts, but they are shaping up quite nicely. The felucca is really nice kit that is easy to work on. The sloop is a little rough, but still a nice ship.
A closer view of the sloop and felucca
A view of the sloop's stern
I think the Barbary ships are coming along nicely and even if I don't get the five gunboats that are on order, I should have a nice force.

American Ships
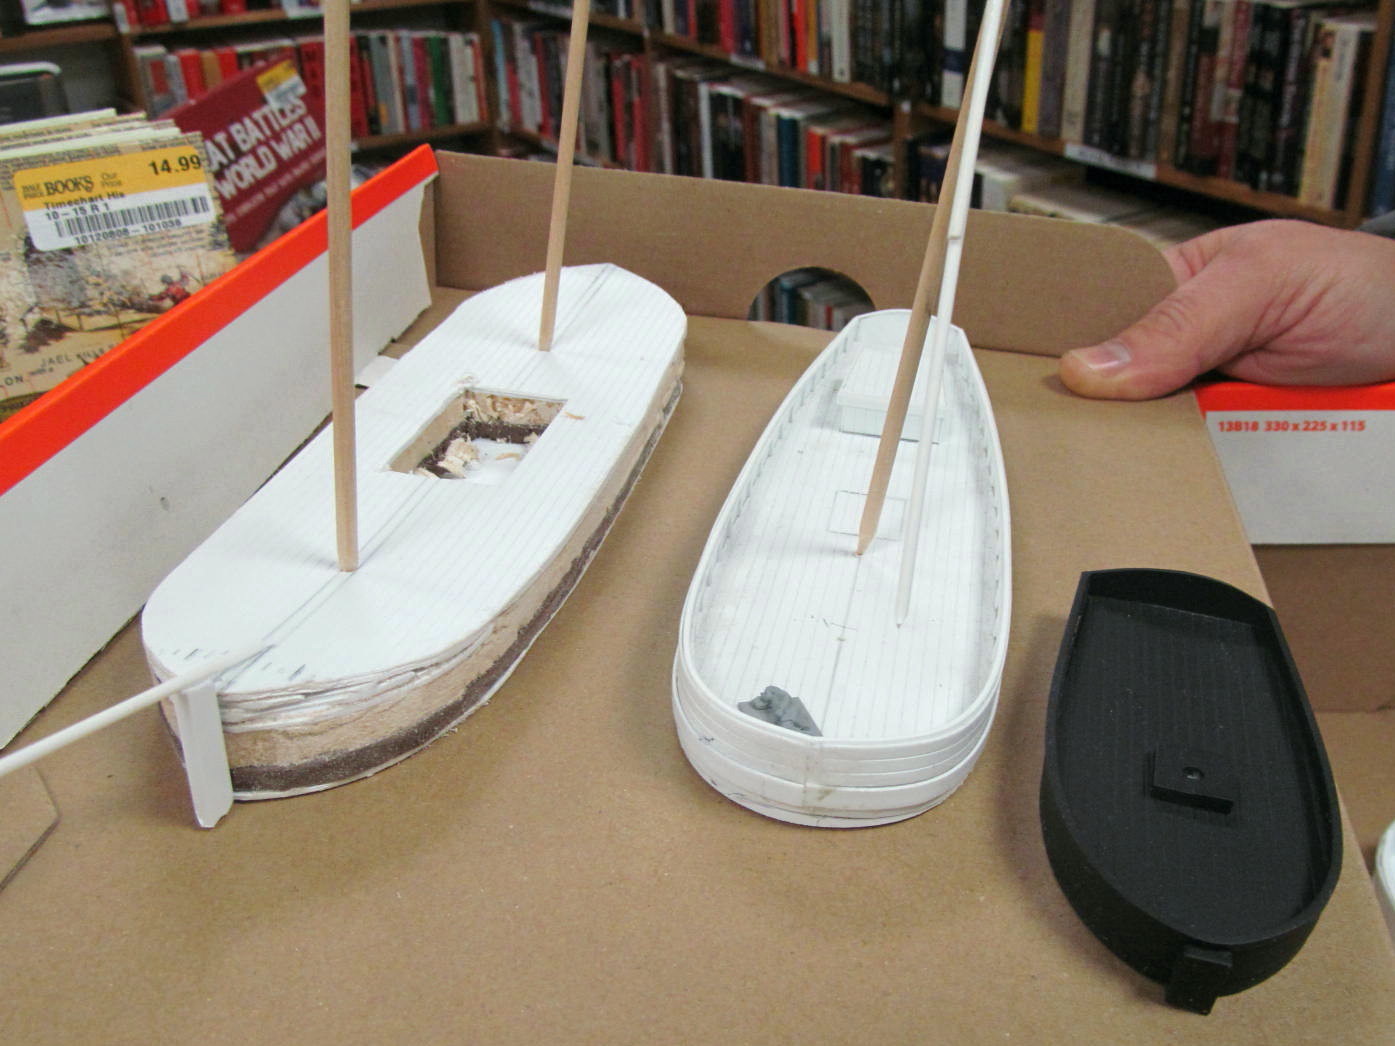
As I mentioned above, my friend George offered to build the gunboats and mortar boats for the Americans. Originally he was going to make one model of each and then get someone he knew to cast the boats in resin. That part fell through, but he was still up for building the boats. Here are a couple photos of the work so far.
Work in progress, the mortar boat (back), a gunboat (center), and one of my gunboats (for size comparison) in the foreground
A bow view of the work in progress
For the American schooner I was planning on using the Old Glory Vixon model I purchased earlier this summer. However, when I pulled out the Old Glory kits and started comparing them to the other stuff I had, I realized that they did not seem to fit with my other kits. My other kits might be a little big, but after measuring the Old Glory ships again I'm convinced they maybe really 10mm or 12mm, but not true 15mm. The gunboats kits will still be usable (they will just be really small gunboats), but I don't think the schooner kit will work. It is just too small for the 15mm figures. Just to give you an idea of size, I've included a photo of the gunboat with one of the guns from another kit.
Gunboat 5 vs the gun
The gun on the bow of the gunboat is supposed to be a 24 pound long gun, while the gun on the left would be an 18 pound long gun. As you can see, there is a little size discrepancy.

I decided to go ahead and spend the money on a Thoroughbred schooner, which should arrive this week. But that sort of shot a hole in my budget for the project.

Next up I'll be talking about the 15mm figures for the game.

Sunday, November 22, 2015

Back to some blogging

I’ve been neglecting my blog somewhat lately (only two posts in the past few months). I have been busy with work and other stuff, but I’m planning on getting back to posting again. I actually have things to post, but just haven’t finished writing them all down. I have a couple partially finished book reviews, a review of the Hell Hath No Fury rules, and a few other odds and ends.

But instead of trying to finish some older post, I will start off with something that is currently in the works. Those of you that follow my blog know that this is the time I’m usually busy preparing for DANG (Dave's Annual Naval Game) and that is the case this year too.

Earlier this year the DANG group voted on the game and, after a close vote, this year’s game is The Shores of Tripoli: US Navy vs. Barbary Pirates. The game will cover the attacks by the U.S. Navy on Tripoli in early August 1804. The primary combatants will be gunboats, but there will be some larger ships and shore guns too. I’m expecting the mini-campaign to have two or three gunboat battles and possibly a shore action.

Decatur Boarding the Tripolitan Gunboat, by Dennis M. Carter (from Wikipedia)
The game will use 15mm scale figures and ships, which is a major difference from other DANG games. I think the 15mm scale will make the gunboat battles more interesting and allow for some boarding actions (like the above picture). Over the past several years I have been collecting ships for this and similar actions. So, while I’m happy to finally plan on getting these models into action, it does mean I have to actually put them together.

I’ll be posting more about the mini-campaign and my work on ships and figures shortly.

This is DANG’s fourteenth year. Here are links to recaps of games from before 2010, the 2010 Lepanto game, and the American Civil War river game from 2011, the 1812 Lake Ontario game from 2012, the Operation Landcrab game from 2013, and last year's Cogs of War game.

Thursday, November 12, 2015

2015 NHMGS Game Day at the Museum of Flight

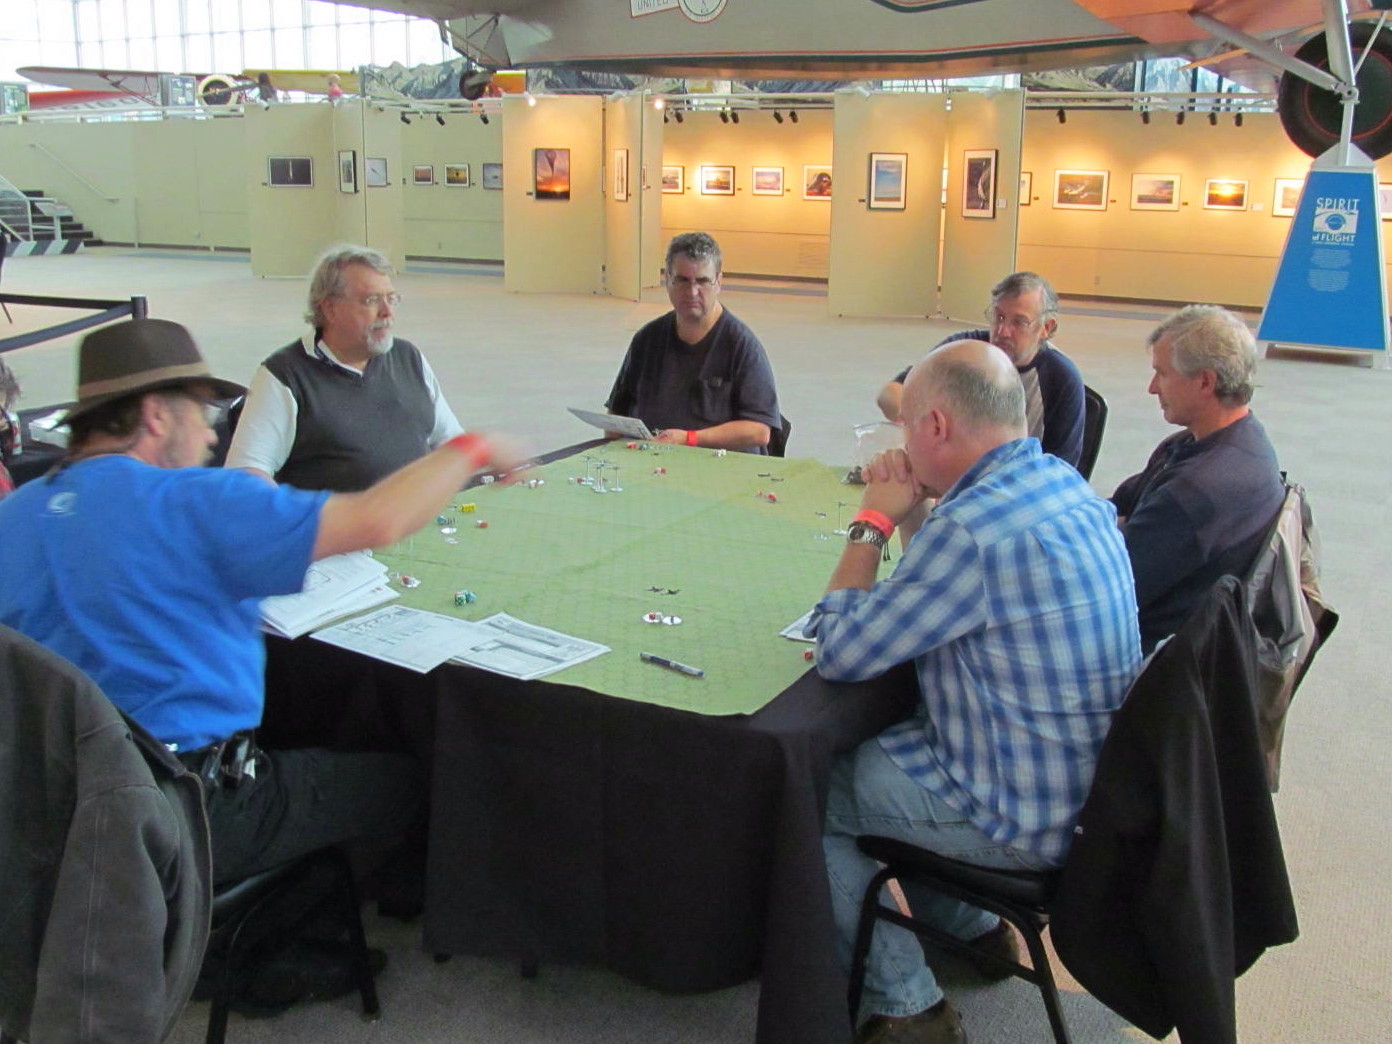
NHMGS held our annual game day at the Museum of Flight on November 8. We were originally schedule for the previous week, but an unexpected scheduling conflict forced us to move to the 8th. Unfortunately, the schedule change lowered gamer turn-out for the event.

We were back in the museum’s main gallery under the Blackbird (not a standard SR-71, but the last surviving M-21 version). We set up our information table and four gaming tables around the Blackbird. I spent the most of the day at the information table, but took time to grab some photos of the games.
This year's information table (we forgot the banner)
The morning session had a Wings of Glory World War 1 game, a Check Your 6 World War 2 raid over Rabaul game, a Golden Age Air Racing game, and an All Quiet on the Martian Front game.
The busy Wing of Glory game
The object of the fighters attention
The Check Your 6 game getting underway
Corsairs and Zeros square off
The running (flying) start for the air race
The field was pretty spread out at this point, but I understand the finish was pretty close
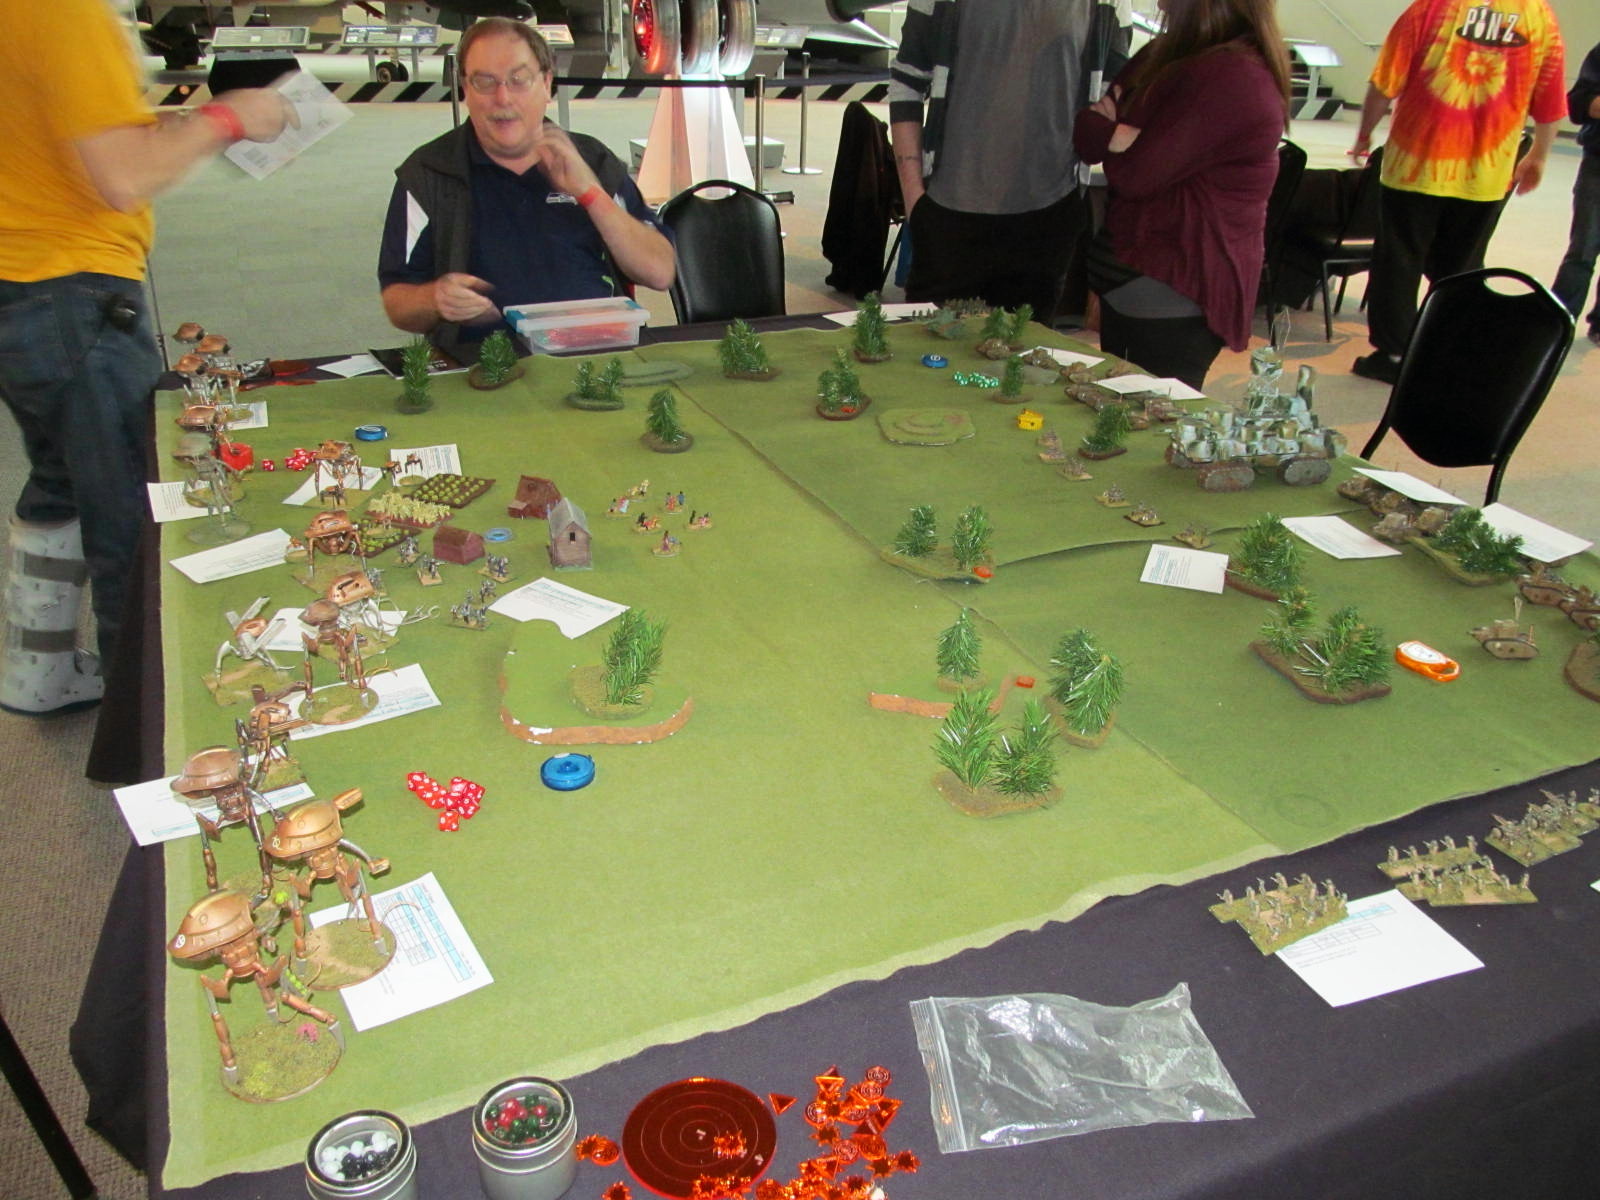
All Quiet on the Martian Front starting off

The Martians advance, but were taking heavy damage
In the afternoon we only had two games going, a Thunderboats hydroplane racing game and a Star Wars Armada game.
Hydroplanes on display(the checkboard pattern in the front left was hand-painted)

The new "pickle-fork" boat takes the lead
A busy Star Wars Amada game with a few museum visitors participating
As with last year’s event, there were fewer people at the museum on Sunday than we have seen at Saturday game days. A lot of the people I talked with had never heard of miniature wargaming before, so it was fun to try to explain it from the ground up. This year I remembered to add some websites with free rules to the information handout, so I was able to direct to those when they asked about getting started. We did get a few people to join in the Wings of Glory and Armada games. So maybe we will get a few membership inquires.

The game day is always a good opportunity to show off the hobby to the general public and the museum is a really great forum for it.

Sunday, September 20, 2015

Gaming at the Columbia River Maritime Museum

Earlier this year Lloyd Bowler, from Astoria Oregon, had proposed a game day at the Columbia River Maritime Museum.The idea was to have something along the lines of the NHMGS Game Days at the Museum of Flight (here is a report from our 2014 game day) in Seattle. But since it was the first year and there are fewer gamers near Astoria, it would start a little smaller.

The event date was set for Sunday, September 6. I had an event with my veterans group on Saturday in Portland, so it was relatively easy for my wife and I to go to Portland, spend the night in Astoria, and for me to attend the game day on Sunday.
Here are a few photos from the event.
The information table with some figures and rules
There were two gaming tables and an information table at the event. The museum is very nice (although I didn't get a chance to go through all the exhibits) and provided the tables in a good space with lots of passer-by traffic.
Wings of Glory setup
One of the tables had the Wings of Glory WWI game going on part of the table and other other part had a display of ACW figures.
Explaining the hobby and showing some of the Civil War figures
I was over at the other table most of the day, playing in a Battle of Memphis game using the Steam and Sail Navies rules. I like these rules, but it has been a little while since I played, so it took a few turns to get up to speed. 
Battle of Memphis, squadrons closing with each other
I was on the Confederate side, running a couple sidewheel gunboat rams. My plan was to sneak around the Union rear and then use my speed to hit them from the flanks. Unfortunately for my plan, the Union forces were disorganized early on when one of their ships ran aground on sandbar in the in middle of the river. The caused them to turn directly into my ships and I had to go head-to-head with a could City class ironclads. Luckily for me, I survived the pass-by broadsides and got one of my ships in position to ram the Union ram Switzerland.
CSS Bragg rams Switzerland
We had to wrap up the battle shortly after my successful ram. Both sides had taken some damage and the battle was really still up in the air, but I felt pretty good that I was the only one to sink an enemy ship.
In the afternoon, I joined in the Thunderboats hydroplane racing game (another game I haven't played for a while). Most of the racers were new to the game, so I had a slight advantage once I remembered how to play the game. I had a bad starting position, but about half-way through the first lap I decided to push my luck and was able to get in front of the pack.
My boat takes the lead in the first lap
After that, some good die rolling kept me in front for the win.

It was a fun time at the museum and it is always interesting to share a bit about the hobby with the general public, most of whom had never heard about wargaming.

Thanks to Lloyd and the Astoria crew for putting together the event.


Thursday, August 27, 2015

Summer Solo Project - Operation Battleaxe

I'm finally getting around to posting the initial battle reports from my Summer Solo Project.

Just to recap, my choice was to play tank actions from the World War 2 Western Desert Campaign using the Hell Hath No Fury (HHNF) rules from Two Hour Wargames. Because the HHNF rules only cover the European Western Front, I had to come up with stats for the tanks and force availability tables for the missions.

I will do a full review of the HHNF rules in a different post, but as a quick overview the rules are similar to a lot of Two Hour Wargames rules in that they are quick-play, use d6s, and units (tanks in this case) are rated for Reputation which determines how well they take actions during the game. The game system is fairly interactive, giving each side a chance to keep in the action. The rules are also very solitaire friendly, with tables for determining enemy actions and forces.

I decided to use Operation Battleaxe as my starting point and got all the tanks ready to go for a mini-campaign. The recommended play area for HHNF is a 3 foot by 3 foot space divided into 9 squares. I have an old DBA desert board, which is 2 foot x 2 foot. and decided to use that as my play area (I reduced the movement ratings appropriately for the smaller space).

Operation Battleaxe:
This operation was launched to relieve the forces in Tobruk and open up the coast road by retaking Halfaya Pass (aka Hellfire Pass). Historically the battle was fought over three days. The area around the pass was heavily contested, while away from the pass British forces made some headway on the first day, then were forced on the defensive on the second day, and narrowly avoiding encirclement on the third day.

I decided to cover the tank battles away from the pass using 3 missions that essentially each covered a day of the historical operation (I had the option for a fourth mission if things went really well or really bad).

My core unit for the campaign is a troop (platoon) of three Crusader I tanks. I used a Rep 5 for my troop leader/tank commander (higher Rep is better) and randomly rolled for the Reps of the other two tanks in the troop and for the crew of my tank. Everybody ended up a 3, except for the loader on my tank, who came up Rep 4 which really helped out during the fighting.

Mission 1 - Breakthrough
In this mission my troop was on the attack, with support from another troop of Crusader I tanks. I put out some terrain, randomly determined my entry side and moved my tanks onto the board. Then the PEFs (Possible Enemy Forces) were placed.
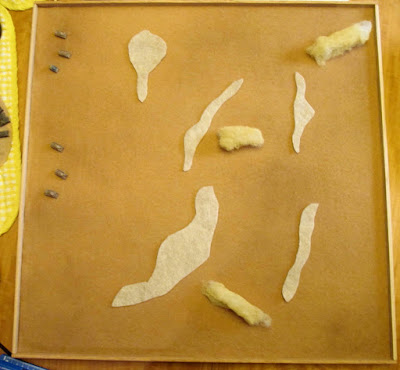
Overview of the battlefield for the first mission. My tanks are on the left with the PEF dust clouds in the center and right
My troop was trying to move up the center to get to the big ridge, but there were a couple PEFs nearby. You don't know what the PEFs are until you make visual contact.
Dust clouds on the horizon as see by my tanks.

The Germans won initiative on the first turn and the center PEF moved up to the narrow ridge in front of my tanks. The PEF turned out to be a Panzer IVE (Rep 4). I diced off the sighting test, narrowly wining the first shot. I hit the Panzer IV, but unfortunately, I couldn't get a good penetration roll.

In HHNF, most attempts to do an action (other than basic movement) are rolled against your Rep. Usually you roll two dice and check the number of passes (dice equal to or less than your Rep) to determine the result. But when checking to see if you destroy an enemy tank, you take the difference between gun penetration and armor value to check for successes. My gun's penetration was a 4 while the German armor was 3. I needed to roll two 1's to destroy the Panzer IV or one to disable it.

The Germans did a reaction check, passed and fired back, but also couldn't get penetration. we kept firing on reactions, until our loaders failed their reload checks.
My Crusaders face off against the lone Panzer IV

On my turn I activate my troop, moved to get around the side of the German and let my other tanks fire.I was able to get a disabling roll that put the German out of action.

I was a little worried at this point, because the second PEF was moving up on my right. But when the PEF came into sight, it turned out to be a false alarm.

On the left, my supporting troop moved up to a hill and saw that the third PEF was four Panzer IIIFs (Rep 4, 4, 3, and 3). 
This doesn't look good.
The supporting troop was able to draw the attention of the Panzer IIIs, while I moved my troop around the flank.

In the end, I was able to flank the Germans and catch them in a crossfire to successfully complete this mission. I only had one of my troop's tanks get disabled, while the supporting troop had two disabled tanks. I was able to recover my tank and return it to service after the mission (Yes there are tables for checking on that). I also checked for any Rep improvement and got my gunner to up his Rep to 4, which would be a definite help. With the offensive starting out well, it is was on to mission 2.

Mission 2 - Seize and Hold
I randomly rolled for my next mission based on the success of my first mission (I made up my own mission flow charts for this mini-campaign. For the base rules you just roll randomly). In this mission my troop and another supporting troop were supposed to take and hold a small oasis on the map.

My supporting troop moved up one side of the map and quickly ran into a group of three Panzer IVEs (all Rep 4).
Not a good position for the Crusader tanks
The Germans made short work of the supporting troop as my troop tried to move up the middle to the objective. 

I sighted the other PEFs. The first group turned out to be three Panzer IIIFs (Rep 4, 4, and 3) and the second was four Panzer IIIFs (Rep 4, 4, 3, and 3). Badly out numbered, I decided that it would be better to make a hasty retreat. 

I was able to retreated with my command tank, leaving behind one destroyed and one disabled tank from my troop and three disabled tanks from the supporting troop. Needless to say, this mission was not successful. However, I was lucky enough to get my troop back up to full strength for the next mission. I also checked for improvement on my tank, but no one moved up in Rep this time.

Mission 3 - Defend
For mission 3 I was on the defensive. I had another supporting troop, but they would not arrive until the 4th turn.

I watched the PEFs advance across the map and moved to try to engage them one at a time. The first PEF turned out to be a false alarm. The second turned out to be four Panzer IIFs (Rep 4, 4, 3, and 3). But because I was on their flank, I was able to take them out fairly quickly.
Flanking the Panzer IIs
The supporting troop showed up to help block the final PEF, which turned out to be two more Panzer IIFs (both Rep 4). Between my troop and the supporting troop we took out the remaining Germans with no losses.


Luckily I was only facing a recon unit this time and was able to stop the German advance.

Mini-Campaign Outcome:
Because I didn't win or lose all three missions, there was no fourth mission. 
With two successful missions, I considered the overall operation a success from my standpoint. That said, it looked pretty historical in the results.

Overall it was a pretty fun mini-campaign. Each battle took two hours or less (so the rules really lived up to the company's name). With a couple more weeks until the traditional end of summer, I expect to get in a few more battles with the rules and tanks.

Sunday, July 26, 2015

Summer Solo Project - Update 1: The Tanks

As mention in my previous post, I’m working on a Summer Solo Project this year. In the summertime I typically don’t have a lot of extra time for gaming or projects (my wife keeps me busy on the yard!). But I usually have a few hours to myself on the weekends, which is enough for some quick games. Since that time isn’t consistent, it is difficult to get together with anyone else. So I decided to try a solo project.

My project choice was to play tank actions from the World War 2 Western Desert Campaign using the Hell Hath No Fury rules from Two Hour Wargames. I chose the rules because they play well solitaire and because I wanted to keep the project fairly small and cheap, I decided to go with 1/285th scale tanks.

The Western Desert Campaign has always interested me for many reasons - there are lots of back and forth battles with opportunities for each side to be on the offensive and defensive, there are a number of different tanks used (especially on the British side), and it takes place in a relatively short period of time. From a gaming aspect, it is rife with possibilities (unless you want to play urban assaults). With that in mind, I pulled out a few references to figure out what tanks to include in my first stab at the project. I wanted to make sure that the tanks I got would cover a large part of the campaign and check with what was available in my chosen scale.

For the Germans, the choices were pretty easy. I started off with Panzer IIIs. These are GHQ Panzer III F/Gs, but will work for the E and H model too. The German tanks were all done up in German Green Brown (Grun Braun) with a dark wash and highlighting.
Panzer III F/G
Next I went with a Panzer II F for the recon/light tank.
Panzer II Fs, something early-war British tanks can easily take on
Finally, I chose the Panzer IV E/F1 to round out the Germans. At this scale the E model and F1 look pretty much the same.
GHQ Panzer IV F1
That should give me pretty good coverage of German tanks for the campaign.
Panzer forces organized and ready for action
On the British side, I decided to start my focus on the battles of Operation Battleaxe and later. So, for the most part really early war tanks were out and, since I’m focusing on tank vs. tank action, I left out the Matildas and Valentines. My first choice was the Crusader tank, since it fits right in with that period. GHQ makes a Crusader I and Crusader III. I opted for the Crusader I and expect it to do double duty as a Crusader II. The Crusader was painted up in nice tan color with brown and black washes.
GHQ Crusader Is
Next up was the M3 General Stuart, AKA ‘Honey’ tank. I always liked this tank and always thought the nickname was interesting. Although I recently heard a talk from the Flying Heritage Museum where the presenter said that the British never nicknamed the M3 ‘Honey’, which would seem to contradict just about every book I’ve ever read on these tanks. You can see the whole talk on YouTube. For the paint job, I went with a Caunter paint scheme I’ve seen in several places on the internet. It is a tan base, with a stone/blue, and green for the top layer. It turned out okay, but these (or any of my other tanks) won’t win any painting awards.
M3 'Honey' (or maybe just the General Stuart)
For my final batch of British tanks I went with the M3 General Grant. It was sort of a late-comer to the desert battles, but I got it to cover the Gazala and later battles. The paint job on these is a fairly simple tan with some green disruptive colors and a wash.
The large multi-gunned General Grant tanks
I could have selected several other British tank types, but these are good to get me started.
British armour ready to roll
If the playing turns out well, I will probably expand my groups to include some Italians, along with some tank destroyers/anti-tank guns. I might even get some Matilda and Valentine tanks. Next up though is actually playing a game. I also need to put up a post about the rules and my work to come up with ratings for the tanks.

Friday, July 3, 2015

Summertime Update

After taking a little time off after Enfilade and with my usual gaming slow-down for summer yardwork, I’m looking at getting back to some gaming stuff.

Early in June I had an unexpected windfall from a side editing project and I decided to put it into my long-term (meaning I haven’t do a lot of work on it) 15mm Age of Sail project. The main thrust of that project has been the American fight against the Barbary pirates and small gunboat actions. With that in mind I decided to order some 15mm ships from Old Glory Shipyard Buccaneer – Napoleonic Wars line.

Looking through the website, there were several ships I was interested in, but not too many photos of the models. I decided to take a chance on a couple un-photographed kits and ordered the Sloop-of-War Vixon and two Gunboat 5 kits.

There is no description of what the Vixon (which should probably be spelled Vixen) represents, since there were ships with that name in both the American and Royal Navy. Even the fact that they sell the same model in 1/300 scale didn’t help me know what ship it really represented. But I’m guessing that it would work for either ship. The American version was a 14 gun schooner (later changed to a brig rig) that took part in the First Barbary War, which is the ship I’m really looking for. The Royal Navy version was a 14 gun brig from the same timeframe.

When the kit arrived, it didn’t really have any information to clear up the question of what it represented, but it definitely was a brig rig. The ship will work fine for my project, so I guess it doesn’t really matter which ship it is representing. Here are a couple photos of the kit.
All the parts in the Vixon kit (each square on the mat is 2 inches by 2 inches)
A closer view of the hull (click the photo to see a larger version)
As you can see, the resin hull has some nice detail (although the gun ports are all filled and will take a little time to clean out). Overall it looks like a good addition to the fleet.

The Gunboat 5 kit definitely represents the American single-gun Gunboat 5 that crossed the Atlantic and served in the Mediterranean in 1805. It is a nice looking kit.
All the parts for the Gunboat 5 kit
Close-up of the Gunboat 5 hull

My only issue with the model is that it is relatively small, although the measurements seems to match those given in Chapelle’s The History of the American Sailing Navy book. My problem will be fitting many figures on the model.

These kits will get some work a little later this year. But for the rest of summer I have a couple other plans.

First up is my Summer Solo Project, which will be an adaptation of Two Hour Wargames Hell Hath No Fury rules to the Western Desert Campaign.

I had heard about the rules before Enfilade and had a chance to play them there. I like how quick they play and how easy they work for solitaire games. Unfortunately, they only have stats for a handful of American and German late-war tanks. So, I need to spend a little time coming up with stats for the Desert War tanks. I’m also trying to do this on a small (and somewhat cheap) scale, so my plan is to use 1/285 tanks. I’ll have more posts on this project later.

My other summer project will be finishing up and polishing my modern submarine rules. I’ve been working on these for a little while and I think I’m getting close to having something that I want to share with others.

So far summer is looking pretty busy.